Sending Images from the Camera
Operate the camera to send recorded images to a device connected by Wi-Fi.
Operation flow
-
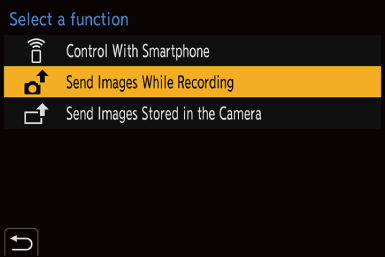
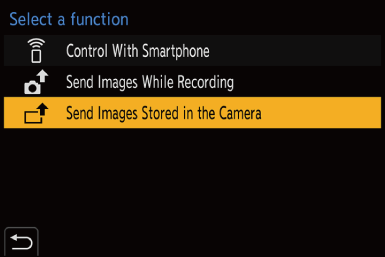
Select the sending method.
Select the sending method from the [Send Images While Recording] and [Send Images Stored in the Camera] camera menus.
-
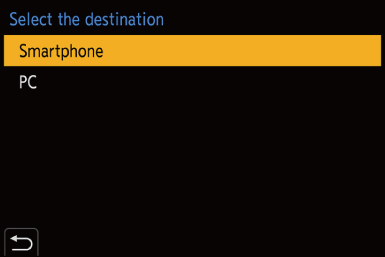
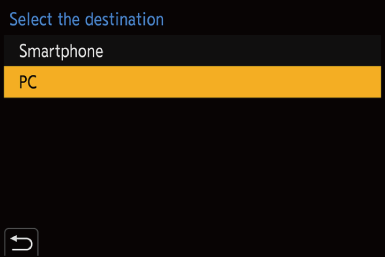
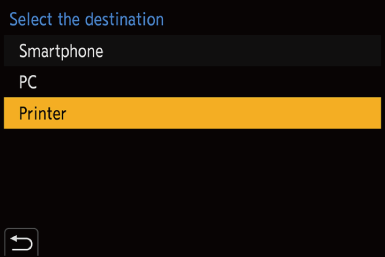
Select the destination (type of the destination device).
 [Smartphone] (
 [Smartphone])
[PC] ([PC])
[Printer] ([Printer])
-
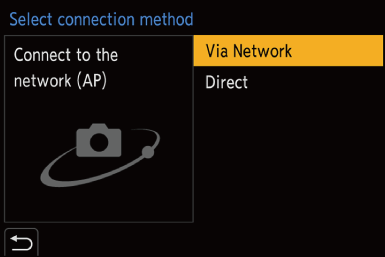
Select the connection method and then connect by Wi-Fi.
[Via Network] ([Via Network])
[Direct] ([Direct])
-
Check the send settings.
Change the send settings as necessary.
Image send settings (Image Send Settings)
-
([Send Images While Recording]) Take pictures.
This automatically sends the recorded pictures as they are taken.
([Send Images Stored in the Camera]) Select an image.
Send the selected images.
Selecting images (Selecting Images)
Refer to the following pages for the steps common to all devices.
Wi-Fi connections: [Via Network] ([Via Network])/[Direct] ([Direct])
Image send settings (Image Send Settings)
Selecting images (Selecting Images)
|
– [Streaming Function] – [Auto Transfer] |
 Images That Can be Sent
Images that can be sent differ depending on the destination device.
|
Destination device |
Images that can be sent |
|
|
[Send Images While Recording] |
[Send Images Stored in the Camera] |
|
|
[Smartphone] ( |
JPEG/RAW |
JPEG/RAW/MP4 |
|
[PC] ( |
JPEG/RAW |
JPEG/RAW/ MP4/MOV/ 6K/4K burst files/ Post-Focus images |
|
[Printer] ( |
— |
JPEG |
Depending on the smartphone or the OS version, these may not be displayed correctly.
It is not possible to send images with file sizes exceeding 4 GB to [Smartphone].
|
|
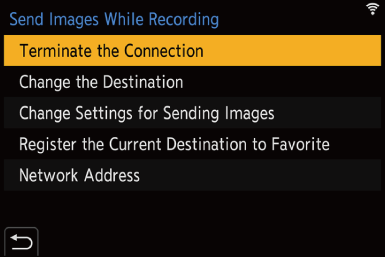
Fn Button Assigned with [Wi-Fi]
You can perform the following operations by pressing the Fn button assigned with [Wi-Fi] after connecting to Wi-Fi.
|
[Terminate the Connection] |
Terminates the Wi-Fi connection. |
|
[Change the Destination] |
Terminates the Wi-Fi connection, and allows you to select a different Wi-Fi connection. |
|
[Change Settings for Sending Images] |
Sets the image size, file format, and other items for sending recorded images. ( |
|
[Register the Current Destination to Favorite] |
Registers the current connection destination or method so that you can easily connect with the same connection settings next time. |
|
[Network Address] |
Displays the MAC address and IP address of the camera. ( |
Depending on the Wi-Fi function being used or the connection destination, you may not be able to perform some of these operations.
[Smartphone]
Transfer recorded images to a smartphone connected using Wi-Fi.
Getting started:
Install “LUMIX Sync” on your smartphone. (Installing “LUMIX Sync”)
-
Select the method for sending the images on the camera.


![]() [
[![]() ]
] ![]() [
[![]() ]
] ![]() [Wi-Fi]
[Wi-Fi] ![]() [Wi-Fi Function]
[Wi-Fi Function] ![]() [New Connection]
[New Connection] ![]() [Send Images While Recording]/[Send Images Stored in the Camera]
[Send Images While Recording]/[Send Images Stored in the Camera]
-
Set the destination to [Smartphone].
-
Connect the camera to a smartphone by Wi-Fi.
Select [Via Network] ([Via Network]) or [Direct] ([Direct]), and then connect.
-
On the smartphone, start up “LUMIX Sync”.
-
Select the destination smartphone on the camera.
-
Check the send settings and then press
or  .
.
To change the send settings of images, press [DISP.]. (Image Send Settings)
-
(When [Send Images While Recording] is selected) Take pictures.
[![]() ] is displayed in the recording screen of the camera while a file is being sent.
] is displayed in the recording screen of the camera while a file is being sent.
To end the connection, follow the steps below:
![]() [
[![]() ]
] ![]() [
[![]() ]
] ![]() [Wi-Fi]
[Wi-Fi] ![]() [Wi-Fi Function]
[Wi-Fi Function] ![]() [Yes]
[Yes]
(When [Send Images Stored in the Camera] is selected) Select an image.
To end the connection, select [Exit].
Sending Images on the Camera to a Smartphone with Simple Operations
You can transfer pictures to a smartphone connected by Bluetooth just by pressing the [Q] button during playback.
You can also use the menu to connect easily.
You can also perform the same operation by pressing the Fn button registered with [Send Image (Smartphone)]. (Fn Buttons)
Getting started:
Install “LUMIX Sync” on your smartphone. (Installing “LUMIX Sync”)
Connect the camera to a smartphone by Bluetooth. (Connecting to a Smartphone (Bluetooth Connection))
Press [ ] on the camera to display the playback screen.
Send a single image
-
Press

 to select the image.
-
Press [Q].
-
Select [Single Select].
To change the send settings of images, press [DISP.]. (Image Send Settings)
-
On the smartphone, select [Yes] (for Android devices) or [Join] (for iOS devices).
This connects automatically using Wi-Fi.
Send multiple images
-
Press [Q].
-
Select [Multi Select].
To change the send settings of images, press [DISP.]. (Image Send Settings)
-
Select the images and then transfer.
: Select images
or : Set/Cancel
[DISP.]: Transfer
-
On the smartphone, select [Yes] (for Android devices) or [Join] (for iOS devices).
This connects automatically using Wi-Fi.
|
– [Streaming Function] – [Auto Transfer] |
Using the menu to transfer easily
![]() [
[![]() ]
] ![]() [
[![]() ]
] ![]() [Bluetooth]
[Bluetooth] ![]() [Send Image (Smartphone)]
[Send Image (Smartphone)]
Settings: [Single Select]/[Multi Select]
If [Single Select], press to select the image and then press or to execute.
If [Multi Select], use the same operation as with “Send multiple images”.
[PC]
Send recorded images to the PC connected with Wi-Fi.
|
Supported OS Windows: Windows 10 Mac: macOS 10.13, 10.14, 10.15.3 to 10.15.7, 11.0 to 11.2 |
Getting started:
Turn on the PC.
Create a destination folder for images.
If the workgroup of the destination PC has been changed from the standard setting, change the corresponding setting of the camera in [PC Connection]. ([PC Connection])
Create a Destination Folder for Images
When using Windows (Example for Windows 10)
-
Select the destination folder and then right-click.
-
Select [Properties] and then enable folder sharing.
When using Mac (Example for macOS 10.14)
-
Select the destination folder and then click the items in the following order.
[File] ![]() [Get Info]
[Get Info]
-
Enable folder sharing.
|
A destination folder may not be created if the account name includes non-alphanumeric characters.
In that case, we recommend changing the name to one consisting only of 15 or less alphanumeric characters.
|
-
Select the method for sending images on the camera.
![]() [
[![]() ]
] ![]() [
[![]() ]
] ![]() [Wi-Fi]
[Wi-Fi] ![]() [Wi-Fi Function]
[Wi-Fi Function] ![]() [New Connection]
[New Connection] ![]() [Send Images While Recording]/[Send Images Stored in the Camera]
[Send Images While Recording]/[Send Images Stored in the Camera]
-
Set the destination to [PC].
-
Connect the camera and PC by Wi-Fi.
Select [Via Network] ([Via Network]) or [Direct] ([Direct]), and then connect.
-
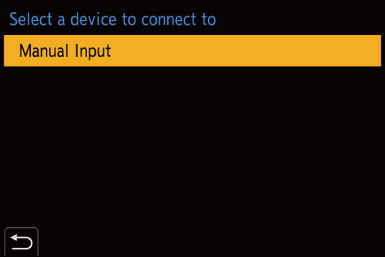
Enter the computer name of the PC name you want to connect to (for Mac, the NetBIOS name).
How to enter characters (Entering Characters)
-
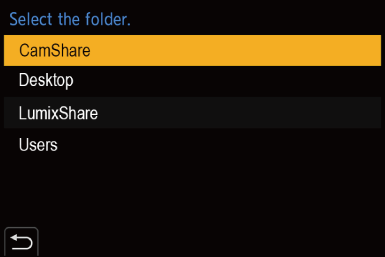
Select a folder for storing images.
Folders sorted by sent date will be created in the selected folder, and images will be saved there.
-
Check the send settings and then press
or .
To change the send setting, press [DISP.]. (Image Send Settings)
-
(When [Send Images While Recording] is selected) Take pictures.
[![]() ] is displayed in the recording screen of the camera while a file is being sent.
] is displayed in the recording screen of the camera while a file is being sent.
To end the connection, follow the steps below:
![]() [
[![]() ]
] ![]() [
[![]() ]
] ![]() [Wi-Fi]
[Wi-Fi] ![]() [Wi-Fi Function]
[Wi-Fi Function] ![]() [Yes]
[Yes]
(When [Send Images Stored in the Camera] is selected) Select an image.
To end the connection, select [Exit].
|
– [Streaming Function] – [Auto Transfer] |
[Printer]
You can send images to a PictBridge (wireless LAN) 1-supported printer connected by Wi-Fi for printing.
-
DPS over IP standard-compliant
-
Select the method for sending images on the camera.
![]() [
[![]() ]
] ![]() [
[![]() ]
] ![]() [Wi-Fi]
[Wi-Fi] ![]() [Wi-Fi Function]
[Wi-Fi Function] ![]() [New Connection]
[New Connection] ![]() [Send Images Stored in the Camera]
[Send Images Stored in the Camera]
-
Set the destination to [Printer].
-
Connect the camera to a printer by Wi-Fi.
Select [Via Network] ([Via Network]) or [Direct] ([Direct]), and then connect.
-
Select the destination printer.
-
Select and print images.
The procedure for selecting images is the same as the one for when the USB connection cable is connected. (Printing)
To terminate the connection, press [ ].
].
|
– [Streaming Function] – [Auto Transfer] |