Basic Recording Operations
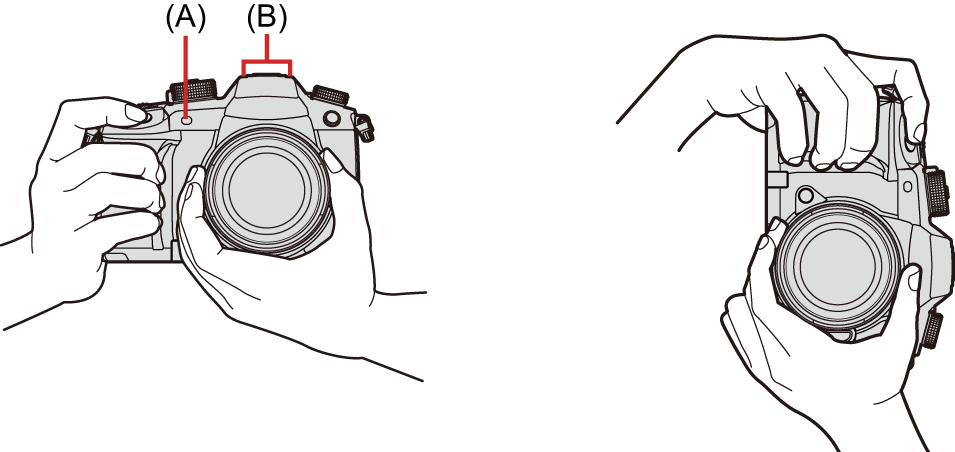
How to Hold the Camera
To minimize camera shake, hold the camera so that it will not move during recording.
Hold the camera with both hands, keep your arms still at your side, and stand with your feet shoulder width apart.
 Hold the camera firmly by wrapping your right hand around the camera grip.
Support the lens from below with your left hand.
 Do not cover the AF assist light (A) or microphone (B) with your fingers or other objects.
 Vertical Orientation Detection Function
This function detects when pictures were recorded with the camera held vertically orientated.
With the default settings, pictures are automatically played back vertically oriented.
If you set [Rotate Disp.] to [OFF], pictures will be played back without being rotated. ( [Rotate Disp.])
|
[ |
Recording
-
Adjust the focus.
Press the shutter button halfway (press it gently).
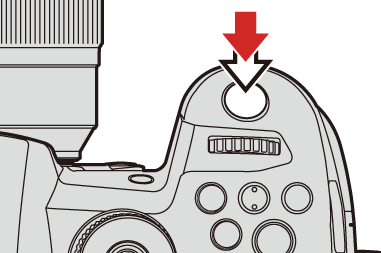
The aperture value (A) and shutter speed (B) are displayed.
(When the correct exposure cannot be obtained, the indications blink in red.)
Once the subject is in focus, the focus icon (C) lights.
(When the subject is not in focus, the indication blinks.)
You can also perform the same operation by pressing [AF ON].

-
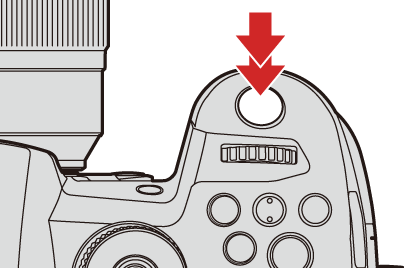
Start recording.
Press the shutter button fully (press it further).
When recording videos, press the video rec. button. (10. Recording Videos)
|
If you set [Focus/Shutter Priority] in the [Custom] ([Focus/Shutter]) menu to [BALANCE] or [RELEASE], you will be able to take a picture even when the subject is not in focus. ( |
Selecting the Recording Mode
-
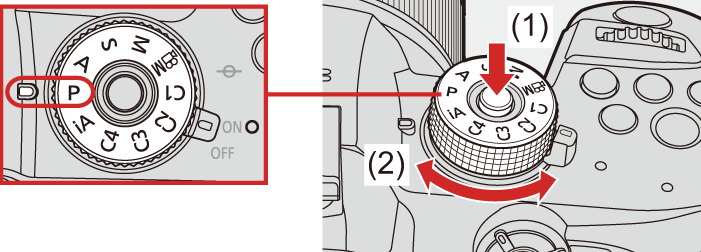
Press the mode dial lock button (1) to release the lock.
The dial is locked if the mode dial lock button is depressed. Each press locks/unlocks the dial.
-
Rotate the mode dial (2) and adjust the recording mode.
|
[iA] |
Intelligent Auto mode ( |
|
[P] |
Program AE mode ( |
|
[A] |
Aperture-Priority AE mode ( |
|
[S] |
Shutter-Priority AE mode ( |
|
[M] |
Manual Exposure mode ( |
|
[ |
Creative Video mode ( |
|
[C1]/[C2]/[C3]/[C4] |
Custom mode ( |