Setting the Clock (When Turning On for the First Time)
When you turn the camera on for the first time, a screen to set the time zone and clock appears.
Be sure to set these settings before use to ensure images are recorded with the correct date and time information.
Clock Set
-
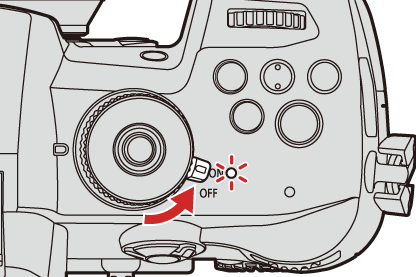
Set the camera on/off switch to [ON].
 When the camera is turned on, the status indicator lights up.
If the language select screen is not displayed, proceed to Step 4.
-
When [Please set the language] appears, press
 or
or  .
.
-
Set the language.
Press 
 to select the language and then press or .
-
When [Please set the time zone] appears, press
or .
-
Set the time zone.
Press 
 to select the time zone and then press or .
 If you are using Daylight Savings [
![]() ], press . (The time will move forward by 1 hour.)
], press . (The time will move forward by 1 hour.)
To return to the normal time, press again.
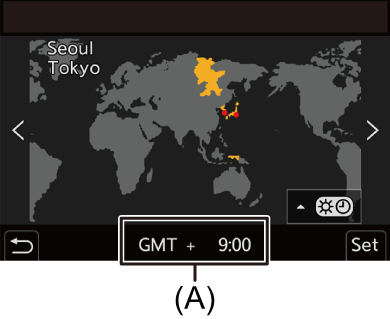
(A) Time difference from GMT (Greenwich Mean Time)
-
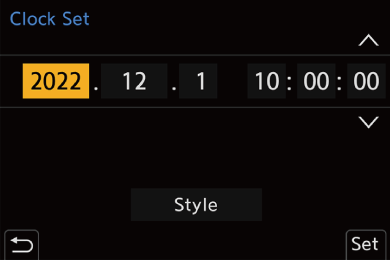
When [Please set the clock] appears, press
or .
-
Set the clock.
: Select an item (year, month, day, hour, minute, or second).
: Select a value.
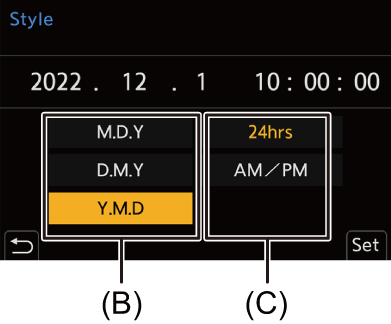
To set the display order (B) and time display format (C)
Press to select the time zone [Style] and then press or , the screen for setting the display order and time display format appears.
-
Confirm your selection.
Press or .
-
When [The clock setting has been completed.] appears, press
or .
|
(Leave the fully-charged battery in the camera for approx. 24 hours to charge the built-in battery.)
– [ – [ |
