Operating the Camera with a Smartphone
This explains the functions for operating the camera from a smartphone.
Functions described in this document with the (![]() ) symbol require a Bluetooth connection by a smartphone that supports Bluetooth Low Energy.
) symbol require a Bluetooth connection by a smartphone that supports Bluetooth Low Energy.
 Home Screen
When you start up “LUMIX Sync”, the home screen is displayed.
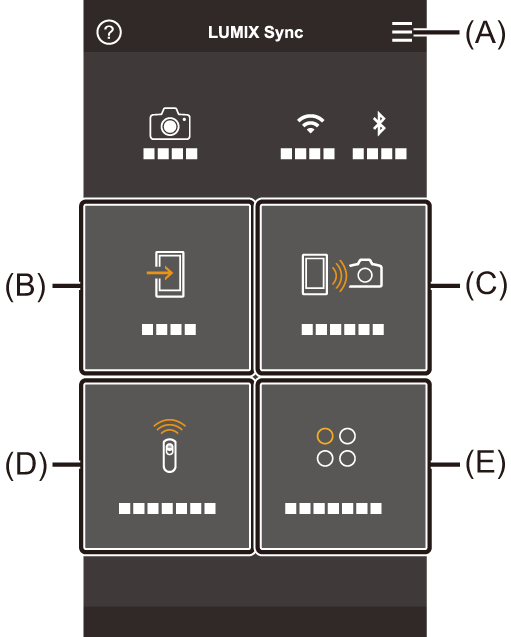
(A) ![]() : App settings
: App settings
This allows connection settings, camera ON/OFF operations, and displays Help.
(B) ![]() : [Import images] (
: [Import images] ( [Import images])
(C) ![]() : [Remote shooting] ([Remote shooting])
: [Remote shooting] ([Remote shooting])
(D) ![]() : [Shutter Remote Control] ([Shutter Remote Control])
: [Shutter Remote Control] ([Shutter Remote Control])
(E) ![]() : [Others] (Camera settings copy/live streaming) ([Camera settings copy], 16. Streaming Function)
: [Others] (Camera settings copy/live streaming) ([Camera settings copy], 16. Streaming Function)
[Remote shooting]
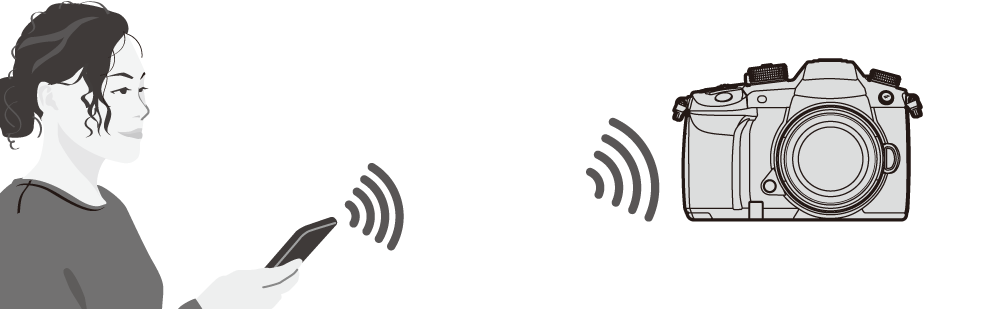
You can use the smartphone to record from a remote location while viewing the live view images from the camera.
Getting started:
 Connect the camera to a smartphone. (Connecting to a Smartphone)
On the smartphone, start up “LUMIX Sync”.
-
Select [
 ] ([Remote shooting]) in the home screen.
(iOS devices) When a message to confirm the change of destination is displayed, select [Join].
-
Start recording.
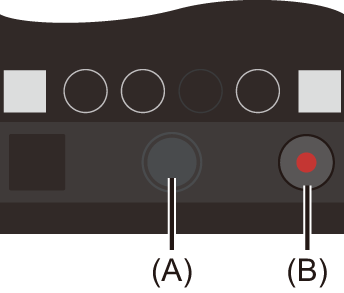
(A) Takes a picture
(B) Starts/ends the video recording
The recorded image is saved on the camera.
|
|
Operation Method During Remote Recording
Set either the camera or the smartphone as the priority control device to be used during remote recording.

![]() [
[![]() ]
] ![]() [
[![]() ]
] ![]() [Wi-Fi]
[Wi-Fi] ![]() [Wi-Fi Setup]
[Wi-Fi Setup] ![]() Select [Priority of Remote Device]
Select [Priority of Remote Device]
|
|
[Camera] |
Operation is possible on both the camera and the smartphone.
|
|
|
[Smartphone] |
Operation is possible only on the smartphone.
|
The default setting is [Camera].
|
|
[Shutter Remote Control]
![]()
You can use the smartphone as a remote control for the shutter.
Getting started:
Connect the camera to a smartphone. (Connecting to a Smartphone)
On the smartphone, start up “LUMIX Sync”.
-
Select [
 ] ([Shutter Remote Control]) in the home screen.
-
Start recording.
![]()
Starts/ends the video recording
![]()
Takes a picture
Bulb Recording
The shutter can be kept open from the start to end of recording, which is useful for recording of starry skies or night scenery.
Getting started:
Set the camera to [M] mode. (Manual Exposure Mode)
Set the camera shutter speed to [B] (Bulb). ([B] (Bulb))
-
Touch [
 ] to start recording (keep touching, without removing your finger).
-
Remove your finger from [
] to end recording.
Slide [![]() ] in the direction of [LOCK] to record with the shutter button locked in a fully-pressed state.
] in the direction of [LOCK] to record with the shutter button locked in a fully-pressed state.
(Slide [![]() ] back to its original position or press the camera shutter button to end recording)
] back to its original position or press the camera shutter button to end recording)
During [B] (Bulb) recording, if the Bluetooth connection is broken, then carry out Bluetooth connection again, then end recording from the smartphone.
Shortening the Return Time from [Sleep Mode]
You can shorten the time it takes for the camera to return from [Sleep Mode] when the [Shutter Remote Control] is used.
Getting started:
Connect the camera to a smartphone by Bluetooth. (Connecting to a Smartphone (Bluetooth Connection))
Set [Remote Wakeup] in [Bluetooth] to [ON].
![]() [
[![]() ]
] ![]() [
[![]() ]
] ![]() [Bluetooth]
[Bluetooth] ![]() Select [Returning from Sleep Mode]
Select [Returning from Sleep Mode]
|
|
[Import / Remote Priority] |
Shortens the time to return when using [Import images] or [Remote shooting]. |
|
|
[Remote Shutter Priority] |
Shortens the time to return when using [Shutter Remote Control]. |
|
– [Remote Wakeup]: [ON] ( – [Auto Transfer]: [OFF] (
|
[Import images]
Transfer an image stored on the card to the smartphone.
Getting started:
Connect the camera to a smartphone. (Connecting to a Smartphone)
On the smartphone, start up “LUMIX Sync”.
-
Select [
 ] ([Import images]) in the home screen.
(iOS devices) When a message to confirm the change of destination is displayed, select [Join].
-
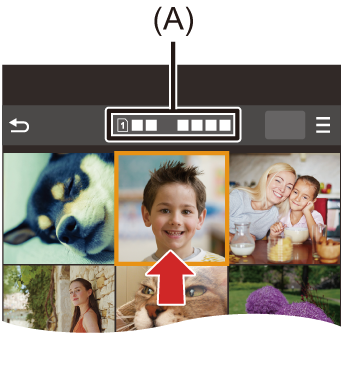
Select the image to transfer.
You can switch the card displayed by touching (A).
-
Transfer the image.
 Select [
![]() ].
].
If the image is a video, you can play it back by touching [![]() ] at the center of the screen.
] at the center of the screen.
|
Depending on the smartphone and on the usage conditions, the image quality may deteriorate or the sound may skip during video or picture playback.
– [MOV] videos – [6K/4K PHOTO]/[Post-Focus] |
[Auto Transfer]
![]()
You can automatically transfer recorded pictures to a smartphone as they are taken.
Getting started:
Connect the camera to a smartphone by Bluetooth. (Connecting to a Smartphone (Bluetooth Connection))
-
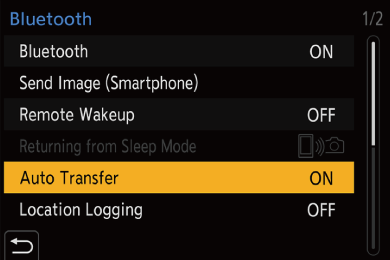
Enable [Auto Transfer] on the camera.
![]() [
[![]() ]
] ![]() [
[![]() ]
] ![]() [Bluetooth]
[Bluetooth] ![]() [Auto Transfer]
[Auto Transfer] ![]() [ON]
[ON]
If a confirmation screen is displayed on the camera asking you to terminate the Wi-Fi connection, select [Yes] to terminate it.
-
On the smartphone, select [Yes] (for Android devices) or [Join] (for iOS devices).
The camera automatically makes a Wi-Fi connection.
-
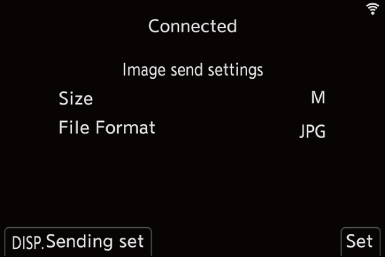
Check the send settings on the camera and then press
or  .
.
To change the send setting, press [DISP.]. (Image Send Settings)
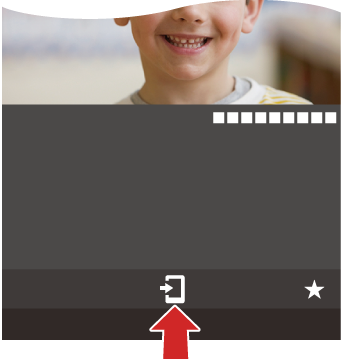
Automatic image transfer is possible when [![]() ] is displayed on the camera recording screen.
] is displayed on the camera recording screen.
-
Record with the camera.
[![]() ] is displayed in the recording screen of the camera while a file is being sent.
] is displayed in the recording screen of the camera while a file is being sent.
To Stop the Automatic Transfer of Images
![]() [
[![]() ]
] ![]() [
[![]() ]
] ![]() [Bluetooth]
[Bluetooth] ![]() [Auto Transfer]
[Auto Transfer] ![]() Select [OFF]
Select [OFF]
A confirmation screen is displayed, asking you to terminate the Wi-Fi connection.
|
Start up the “LUMIX Sync” on the smartphone to connect to the camera.
– If the storage status of unsent files changes, then sending of files may no longer be possible. – If there are many unsent files, then sending of all files may not be possible.
– Video recording/[6K/4K PHOTO]/[Post-Focus] |
[Location Logging]
![]()
The smartphone sends its location information to the camera via Bluetooth, and the camera performs recording while writing the acquired location information.
Getting started:
Enable the GPS function on the smartphone.
Connect the camera to a smartphone by Bluetooth. (Connecting to a Smartphone (Bluetooth Connection))
-
Enable [Location Logging] on the camera.
![]() [
[![]() ]
] ![]() [
[![]() ]
] ![]() [Bluetooth]
[Bluetooth] ![]() [Location Logging]
[Location Logging] ![]() [ON]
[ON]
The camera will enter a mode where location information can be recorded and [![]() ] is displayed in the recording screen of the camera.
] is displayed in the recording screen of the camera.

-
Record images with the camera.
Location information will be written to the recorded images.
|
Smartphone GPS positioning may not be possible if the smartphone is within a building, a bag, or similar. Move the smartphone to a position affording a wide view of the sky to improve positioning performance. In addition, refer to the operating instructions of your smartphone.
|
[Remote Wakeup]
![]()
Even when the camera is turned off, the smartphone can be used to start the camera and record images, or check the recorded images.
Getting started:
-
Connect to a smartphone using Bluetooth. (
Connecting to a Smartphone (Bluetooth Connection))
-
Enable [Remote Wakeup] on the camera.
![]() [
[![]() ]
] ![]() [
[![]() ]
] ![]() [Bluetooth]
[Bluetooth] ![]() [Remote Wakeup]
[Remote Wakeup] ![]() [ON]
[ON]
-
Set the camera on/off switch to [OFF].
-
On the smartphone, start up “LUMIX Sync”.
Turning On the Camera
-
Select [Remote shooting] in the “LUMIX Sync” home screen.
(iOS devices) When a message to confirm the change of destination is displayed, select [Join].
The camera turns on, and automatically connects using Wi-Fi.
Turning Off the Camera
-
Select [
 ] in the “LUMIX Sync” home screen.
-
Select [Turn off the camera].
-
Select [Power OFF].
|
|
[Auto Clock Set]
![]()
Synchronize the clock and the time zone setting of the camera with those of a smartphone.
Getting started:
Connect the camera to a smartphone by Bluetooth. (Connecting to a Smartphone (Bluetooth Connection))
-
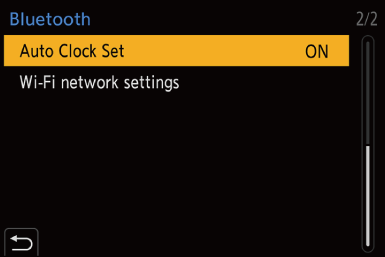
Enable [Auto Clock Set] on the camera.
![]() [
[![]() ]
] ![]() [
[![]() ]
] ![]() [Bluetooth]
[Bluetooth] ![]() [Auto Clock Set]
[Auto Clock Set] ![]() [ON]
[ON]
[Camera settings copy]
![]()
This saves the camera’s settings information to the smartphone.
Saved settings information can be loaded to the camera, letting you set the same settings on multiple cameras.
Getting started:
Connect the camera to a smartphone by Bluetooth. (Connecting to a Smartphone (Bluetooth Connection))
-
Select [
 ] ([Others])
  [
[ ] ([Camera settings copy]) in the “LUMIX Sync” home screen.
-
Save or load settings information.
Read the [Help] in the “LUMIX Sync” menu for further details on how to operate the “LUMIX Sync”.
|
(iOS devices) When a message to confirm the change of destination is displayed, select [Join].
|