Stream by Operating the PC
![]()
![]()
![]()
![]()
![]()
![]()
![]()
![]()
![]()
Via a commercially available USB ethernet adaptor, connect the camera to the router/PC with a wired LAN, then use the streaming software installed on the PC to IP stream. (Supported protocols: RTP/RTSP)

(A) USB ethernet adaptor (commercially available)
(B) LAN cable (commercially available)
(C) Router
Getting started:
 Install the RTP/RTSP compatible streaming software onto your PC.
-
Set the camera’s recording mode to [
 ].
].
 Set the mode dial. (
 Selecting the Recording Mode)
-
Set [IP Address Setting (LAN)] to the same network as the PC.

![]() [
[![]() ]
] ![]() [
[![]() ]
] ![]() [LAN / Wi-Fi]
[LAN / Wi-Fi] ![]() [LAN / Wi-Fi Setup]
[LAN / Wi-Fi Setup] ![]() [IP Address Setting (LAN)] ([IP Address Setting (LAN)])
[IP Address Setting (LAN)] ([IP Address Setting (LAN)])
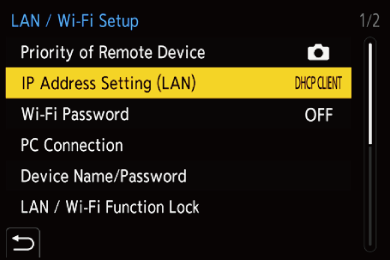
If you have modified settings in [IP Address Setting (LAN)], turn the camera off and on again.
-
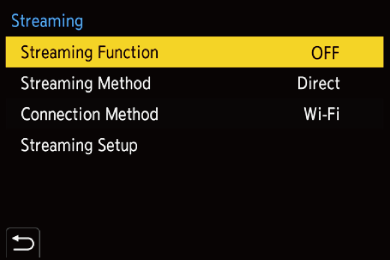
Set up streaming settings on the camera.
![]() [
[![]() ]
] ![]() [
[![]() ]
] ![]() [Streaming]
[Streaming]
-
In [Streaming Method], select [Via PC Software], and set [Connection Method] to [LAN].
-
In [Streaming Setup], set [Streaming Quality] and [RTSP Port].
-
Set [Streaming Function] to [ON].
[![]() ] is displayed on the recording screen.
] is displayed on the recording screen.
-
Connect the commercially available USB ethernet adaptor to the camera, then use commercially available LAN cables to connect the camera and the PC to a router.
-
Use your streaming software to start/end streaming.
Set the URL as follows in your streaming software:
rtsp://(IP address of this camera)/stream
If the [RTSP Port] has been changed from the default setting (554), set as follows:
rtsp://(IP address of this camera):(RTSP port)/stream
When streaming starts, [![]() ] is displayed on the recording screen of the camera.
] is displayed on the recording screen of the camera.
For details about operation methods, refer to the operating instructions of the streaming software.
|
(
(
(The live view is not displayed on the “LUMIX Tether” screen during streaming.) |