[Live Cropping]
![]()
![]()
![]()
![]()
![]()
![]()
![]()
![]()
![]()
By cropping a part of the image from the image displayed in the live view, it is possible to record 4K/FHD video that incorporates panning and zooming with the camera staying in a fixed position.
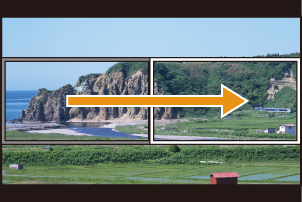
Pan

Zoom in
|
|
-
Set the mode dial to [
 ].
].
 Set the mode dial. (
 Selecting the Recording Mode)
-
Set [Rec. File Format] to [MP4] or [MOV].

![]() [
[![]() ]
] ![]() [
[![]() ]
] ![]() [Rec. File Format]
[Rec. File Format] ![]() [MP4]/[MOV]
[MP4]/[MOV]
-
Select a recording quality with which you can record [Live Cropping] video.
![]() [
[![]() ]
] ![]() [
[![]() ]
] ![]() [Rec Quality]
[Rec Quality]
 A recording quality with which you can record [Live Cropping] video ( List of Recording Qualities That Enable Special Videos to be Recorded)
-
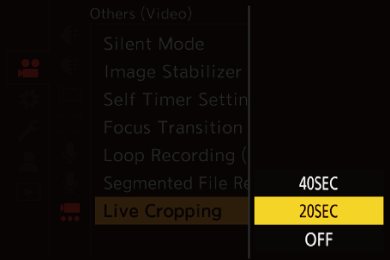
Set the time for panning or zooming.
![]() [
[![]() ]
] ![]() [
[![]() ]
] ![]() [Live Cropping]
[Live Cropping] ![]() [40SEC]/[20SEC]
[40SEC]/[20SEC]
If you have selected a recording quality where Live Cropping recording is not available, the camera switches to a recording quality where recording is possible.
-
Set the cropping start frame.
Select the range to be cropped and press or  .
.
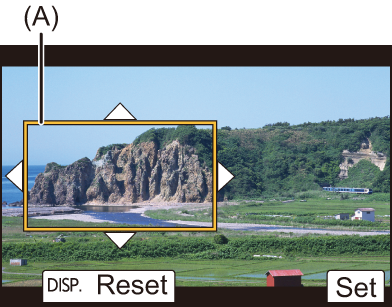
(A) Cropping start frame
-
Set the cropping end frame.
Select the range to be cropped and press or .
To redo the settings for the position and size of the start frame and the end frame, press  .
.
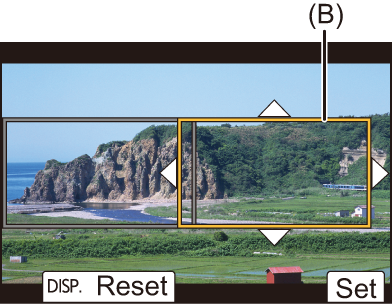
(B) Cropping end frame
-
Start Live Cropping recording.
Press the video rec. button.
When the set operating time has elapsed, recording automatically ends.
To end recording midway, press the video rec. button again.

(C) Elapsed recording time
(D) Set operating time
 Operations for Setting the Cropping Frame
|
Button operation |
Touch operation |
Description of operation |
|
|
Touch |
Moves the frame. |
|
|
Pinch out/ pinch in |
Enlarges/reduces the frame in small steps. |
|
|
|
Enlarges/reduces the frame. |
|
[DISP.] |
[Reset] |
Start frame: Returns the frame position and size to the default settings. End frame: Cancels the settings for the position and size of the frame. |
|
|
[Set] |
Confirms the frame position and size. |


 /
/ 

|
– When a 59.94p or 50.00p [Rec Quality] is set
|