Support for Output of RAW Video Data
 Outputting RAW Video Data via HDMI
Notes When Outputting RAW Video Data
![]()
![]()
![]()
![]()
![]()
![]()
![]()
![]()
RAW Video Data can be output via HDMI to a compatible external recorder.

(A) RAW Video
(B) External recorder
 Recording of the RAW Video Data of this camera has been confirmed on the following external recorders. (As of June 2025)
– ATOMOS: “NINJA V”/“NINJA V+”/“NINJA”/“NINJA ULTRA”/“SHOGUN”/“SHOGUN ULTRA”/“SHOGUN CONNECT”
– Blackmagic Design: “Blackmagic Video Assist 5″ 12G HDR”/“Blackmagic Video Assist 7″ 12G HDR”
For external recorder firmware versions that support recording of RAW Video Data, check the following site:
https://panasonic.jp/support/global/cs/dsc/connect/index.html
(English only)
For details about external recorders, contact either ATOMOS or Blackmagic Design.
This does not guarantee all of the capabilities that the compatible external recorder may have.
You will need compatible software to edit the RAW Video Data recorded with the external recorder. Compatible software supports only V-Log/V-Gamut conversion.
When editing RAW video data that was recorded with an ATOMOS recorder, in order to match the coloring with the V-Log/V-Gamut, download the LUT (Look-Up Table) file from the following support site and load it into the software.
Visit the following site to download LUT file or view the latest support information:
https://panasonic.jp/support/global/cs/dsc/
(English only)
|
|
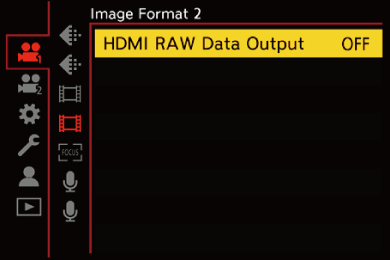
Outputting RAW Video Data via HDMI
The image quality for the output images is set in [Rec Quality].
Getting started:
-
Turn off the camera and the external recorder.
-
Connect the camera and the external recorder with a commercially available HDMI cable.
Use an Ultra High Speed HDMI cable (Type A–Type A plug) with the length less than 3 m (9.8 feet).
-
Turn on the camera and the external recorder.
-
Set to [
 ] mode.

-
Set [HDMI RAW Data Output].

![]() [
[![]() ]
] ![]() [
[![]() ]
] ![]() [HDMI RAW Data Output]
[HDMI RAW Data Output] ![]() [ON]
[ON]
[HDMI RAW] is displayed on the recording screen.
-
Select a recording quality.
![]() [
[![]() ]
] ![]() [
[![]() ]
] ![]() [Rec Quality]
[Rec Quality]

-
Set the HDMI input on the external recorder.
When the connection is complete, images will be displayed on the screen of the external recorder.
|
There are differences from normal HDMI output operation.
– [Info Display] is not available. You cannot output the camera information display to an external recorder connected by HDMI. – [Down Convert] is not available. Outputs at the resolution and recording frame rate of the [Rec Quality]. |
 [Rec Quality] (When [HDMI RAW Data Output] is selected)
|
[Rec Quality] |
[System Frequency] |
[Image Area of Video] |
Resolution |
Frame rate |
|
[8.1K/24p/3:2] |
[59.94Hz (NTSC)] |
[FULL] |
8128×5418 |
23.98p |
|
[8.1K/30p/17:9] |
[FULL] |
8128×4302 |
29.97p |
|
|
[8.1K/24p/17:9] |
[FULL] |
8128×4302 |
23.98p |
|
|
[7.2K/30p/3:2] |
[FULL] |
7232×4820 |
29.97p |
|
|
[5.7K/60p/17:9] |
[PIXEL/PIXEL] |
5728×3024 |
59.94p |
|
|
[5.7K/30p/17:9] |
[PIXEL/PIXEL] |
5728×3024 |
29.97p |
|
|
[5.7K/24p/17:9] |
[PIXEL/PIXEL] |
5728×3024 |
23.98p |
|
|
[4.8K/60p/4:3] |
[APS-C] |
4752×3568 |
59.94p |
|
|
[4.8K/30p/4:3] |
[APS-C] |
4752×3568 |
29.97p |
|
|
[4.8K/24p/4:3] |
[APS-C] |
4752×3568 |
23.98p |
|
|
[8.1K/25p/17:9] |
[50.00Hz (PAL)] |
[FULL] |
8128×4302 |
25.00p |
|
[7.2K/25p/3:2] |
[FULL] |
7232×4820 |
25.00p |
|
|
[5.7K/50p/17:9] |
[PIXEL/PIXEL] |
5728×3024 |
50.00p |
|
|
[5.7K/25p/17:9] |
[PIXEL/PIXEL] |
5728×3024 |
25.00p |
|
|
[4.8K/50p/4:3] |
[APS-C] |
4752×3568 |
50.00p |
|
|
[4.8K/25p/4:3] |
[APS-C] |
4752×3568 |
25.00p |

-
Cannot be set when using an APS-C lens.
-
Cannot be set when [Dynamic Range Expansion(Log)] is set to [ON].
Bit value: 12-bit
Audio format: LPCM (2ch/4ch)
– When the XLR Microphone Adaptor (DMW-XLR2: optional) is connected, if [4ch Audio Recording] is set to [XLR] or [XLR+CAMERA], 4-channel audio can be recorded.
[Image Area of Video] is fixed to the image area according to the [Rec Quality] setting.
|
|
Monitor/Viewfinder Display When Outputting RAW Video Data
Images equivalent to those recorded when recording with V-Log are displayed on the monitor/viewfinder of the camera for monitoring purposes. [LUT View Assist (Monitor)] with the [Vlog_709] preset applied can be used for the [Log View Assist].
The LUT for the monitor display cannot be changed.
When you use [LUT View Assist (Monitor)], [709] is displayed on the screen and [RAW] is displayed on the screen as a [LUT View Assist (HDMI)] item.
[Luminance Spot Meter], and [BASE/RANGE] of [Zebra Pattern] are set at “Stop” units.
(18 % gray output level is calculated as 0 Stop)
Notes on displayed images
The images displayed on the camera do not affect the RAW Video Data that is output.
The images displayed on the external recorder are images that suit the external recorder specifications. This means that there may be differences between the images displayed on the camera and the images displayed on the external recorder.
The monitor/viewfinder of the camera shows images with the angle of view of the RAW Video Data. There may be some difference with the angle of view of the data recorded on the external recorder.
[HDMI Time Code Output]/[HDMI Recording Control]
The time code of the camera can be added and output via HDMI to the external recorder.
In addition, recording can be started and stopped on the external recorder by using the video rec. button and shutter button of the camera.
-
Set [HDMI Time Code Output] to [ON].
![]() [
[![]() ]
] ![]() [
[![]() ]
] ![]() [Time Code]
[Time Code] ![]() [HDMI Time Code Output]
[HDMI Time Code Output] ![]() [ON]
[ON]
-
Set [HDMI Recording Control] to [ON].
![]() [
[![]() ]
] ![]() [
[![]() ]
] ![]() [HDMI Rec Output]
[HDMI Rec Output] ![]() [HDMI Recording Control]
[HDMI Recording Control] ![]() [ON]
[ON]
[HDMI Recording Control] can be set when [HDMI Time Code Output] is set to [ON] in [![]() ] mode.
] mode.
Notes When Outputting RAW Video Data
Operation is as follows when outputting RAW Video Data:
The lower limit of available ISO sensitivity is [200] (when [Extended ISO] is set: [100]), and the upper limit is [51200].
The range of available ISO sensitivities is also different for [LOW] and [HIGH] in [Dual Native ISO Setting].
[AWB], [AWBc], [AWBw] and [![]() ] cannot be used for white balance.
] cannot be used for white balance.
[Photo Style] is fixed to [V-Log], and image quality cannot be adjusted.
[![]() ]/[
]/[![]() ] of the AF mode is not available.
] of the AF mode is not available.
Enlarging the display with [MF Assist] and [Enlarged Live Display(Video)] is not possible.
The following functions are not available:
– [Master Pedestal Level]
– [i.Dynamic Range]
– [Vignetting Comp.]
– [Diffraction Compensation]
– [Filter Settings]
– [Rec. File Format(Video)]
– [Filtering] and [add to list] in [Rec Quality]
– [Rec Quality (My List)]
– [Luminance Level]
– [E-Stabilization (Video)] ([Image Stabilizer])
– [Loop Recording (video)]
– [Segmented File Recording]
– [Color Bars]
– [Streaming]