Setting the Clock (When Turning On for the First Time)
When you turn the camera on for the first time, a screen to set the time zone and clock appears.
Be sure to set these settings before use to ensure images are recorded with the correct date and time information.
-
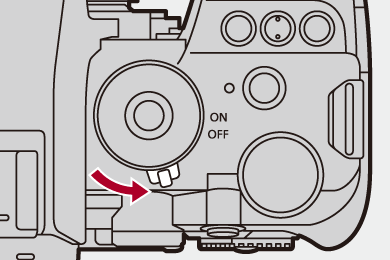
Set the camera on/off switch to [ON].
 If the language select screen is not displayed, proceed to Step 4.
-
When [Please set the language] appears, press
 or
or  .
.
-
Set the language.
Press 
 to select the language and then press or .
-
When [Please set the time zone] appears, press
or .
-
Set the time zone.
Press 
 to select the time zone and then press or .
 If you are using Daylight Savings [
![]() ], press . (The time will move forward by 1 hour.)
], press . (The time will move forward by 1 hour.)
To return to the normal time, press again.
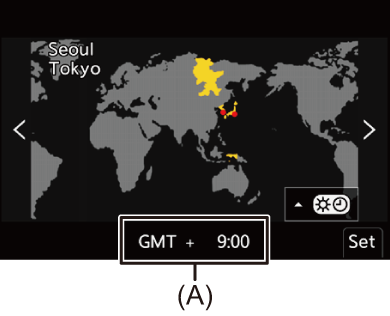
(A) Time difference from GMT (Greenwich Mean Time)
-
When [Please set the clock] appears, press
or .
-
Set the clock.
: Select an item (year, month, day, hour, minute, or second).
: Select a value.
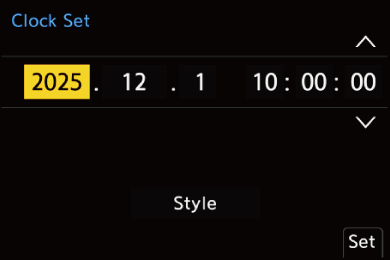
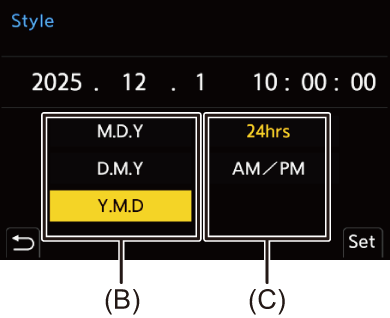
To set the display order and time display format
To display the screen for setting the display order (B) and time display format (C), select [Style] by pressing and then press or .
-
Confirm your selection.
Press or .

-
When [The clock setting has been completed.] appears, press
or .
|
(Leave the fully-charged battery in the camera for approx. 24 hours to charge the built-in battery.)
|
