Lens Compensation

[Vignetting Comp.]
![]()
![]()
![]()
![]()
![]()
![]()
![]()
![]()
![]()
When the screen periphery darkens as a result of the lens characteristics, you can record pictures with the brightness of the screen periphery corrected.

![]() [
[![]() ]/[
]/[![]() ]
] ![]() [
[![]() ]
] ![]() Select [Vignetting Comp.]
Select [Vignetting Comp.]
Settings: [ON]/[OFF]
|
– [Ex. Tele Conv.]
– [APS-C] in [Image Area of Video] (only when using a full-frame lens), [PIXEL/PIXEL] |
[Color Shading Compensation]
![]()
![]()
![]()
![]()
![]()
![]()
![]()
![]()
![]()
Compensate for the coloring that occurs around the screen (color shading) due to the characteristics of the lens.
 When using an L-Mount lens
The color shading is automatically compensated, but it is also possible to make manual fine adjustments.
-
Select [Color Shading Compensation].

![]() [
[![]() ]/[
]/[![]() ]
] ![]() [
[![]() ]
] ![]() [Color Shading Compensation]
[Color Shading Compensation]
-
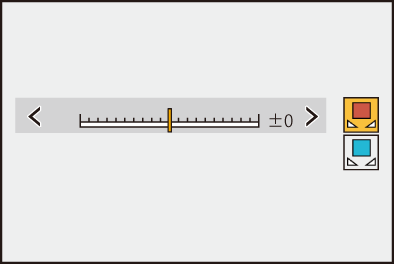
Adjust the red tint and blue tint.
Press 
 to select [Red Tint]/[Blue Tint], then press
 to adjust.
You can also adjust by rotating  ,
,  , or
, or  .
.
-
Press
or  to confirm the setting.
The adjusted value is not recorded.
When Using Other Than an L-Mount Lens
You can compensate for the color shading for other than L-Mount lenses and register the compensation details.
Select [Color Shading Compensation].
![]() [
[![]() ]/[
]/[![]() ]
] ![]() [
[![]() ]
] ![]() [Color Shading Compensation]
[Color Shading Compensation]
[MANUAL]
Compensate for the color shading of the attached lens.
-
Press
to select [MANUAL] and then press or .
-
Press [DISP.] to execute color shading compensation.
Execute while the screen is filled with a subject that has no color variation, such as a white or gray one.
If further adjustment is required, press and make fine adjustments manually.
-
Press
or to confirm the setting.
The compensation value and adjusted value are not recorded. To record them, press [DISP.] in the adjustment screen and make a preset registration.
[PRESET]
Compensate for the color shading of the attached lens and make a preset registration. ( Registering presets)
You can also call up presets that have already been registered.
[OFF]
The color shading compensation is not applied.
[ADJUST]
Fine-adjust the red tint and blue tint.
The adjusted value is not recorded.
If a compensation value already registered in [PRESET] is adjusted, [ ] is displayed next to [PRESET].
|
– Operating the camera on/off switch – Replacing the lens |
Registering presets
You can register up to 12 sets of compensation settings.
-
Select [PRESET] in [Color Shading Compensation].
![]() [
[![]() ]/[
]/[![]() ]
] ![]() [
[![]() ]
] ![]() [Color Shading Compensation]
[Color Shading Compensation] ![]() [PRESET]
[PRESET]
-
Select any of [SET1] to [SET12] and press
or .
-
Select [Compensate/Adjust] and then press
or .
-
Press [DISP.] while the screen is filled with a subject that has no color variation, such as a white or gray one.
Color shading compensation is executed. Press or .
If further adjustment is required, press and make fine adjustments manually.
-
Select [Focal Length]/[Aperture] and then press
or .
Press to select the item and then press to enter the value.
-
Select [Note] and then press
or .
You can enter any information, such as a lens name, etc.
Up to 26 characters may be entered. Double-byte characters are treated as 2 characters.
How to enter characters (Entering Characters)
-
Press [DISP.] to register the compensation settings.
Changing and deleting presets
-
Select [PRESET] in [Color Shading Compensation].
![]() [
[![]() ]/[
]/[![]() ]
] ![]() [
[![]() ]
] ![]() [Color Shading Compensation]
[Color Shading Compensation] ![]() [PRESET]
[PRESET]
-
Press
to select a registered preset, then press [DISP.].
-
Press
to select [Edit], [Sorting], or [Delete], and then press or .
You can change the details in the registered preset when you select [Edit]. (Registering presets)
You can change the display order of the presets by selecting [Sorting].
The preset is deleted when you select [Delete]. You cannot delete the preset that is being used.
|
|
[Diffraction Compensation]
![]()
![]()
![]()
![]()
![]()
![]()
![]()
![]()
![]()
The camera raises the image resolution by correcting the blurriness caused by diffraction when the aperture is closed.
![]() [
[![]() ]/[
]/[![]() ]
] ![]() [
[![]() ]
] ![]() Select [Diffraction Compensation]
Select [Diffraction Compensation]
Settings: [AUTO]/[OFF]
|
|