[Playback] Menu
 How to Select an Image(s) in the [Playback] Menu
 [Playback] ([Add/Delete Info.])
How to Select an Image(s) in the [Playback] Menu
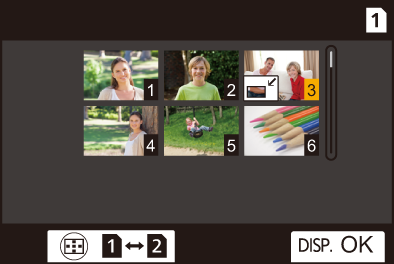
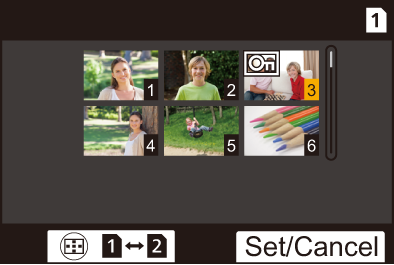
Follow the steps below when the image selection screen is displayed.
 Images are displayed separately by card slot.
 You can only select images on one card at a time.
 When [Single] Has Been Selected
-
Press

 to select the image.
-
Press
 or
or  .
.
 If [Set/Cancel] is displayed at the right bottom of the screen, the setting is canceled when
  or
or  is pressed again.
 When [Multi] Has Been Selected
When you press [ ], the card that is displayed is switched.
-
Press


 to select the image and then press
  or
or  (repeat).
 The setting is canceled when
  or
or  is pressed again.

-
Press [DISP.] to execute.
When [Protect] is selected
Press 


 to select the image, and then press
  or
or  to set (repeat).
 The setting is canceled when
  or
or  is pressed again.

[Playback] ([Playback Mode])
|
|
[Playback Mode]
|
|
|
Filters the type of images to play back.
|
[Slide Show]
|
[All] / [Picture Only] / [Video Only] / [Rating] |
|
Selects image types and plays them back at regular intervals in order.
[Start]: Starts slide show playback. [Duration]: Sets repeat playback. [Repeat]: Sets repeat playback. Operations during slide show
|
[Rotate Disp.]
|
|
|
Automatically displays pictures vertically if they were recorded when holding the camera vertically. |
[Picture Sort]
|
[FILE NAME] / |
|
This sets the order in which the camera displays images during playback. [FILE NAME]: Displays images by folder name/file name. [DATE/TIME]: Displays images by recording date.
|
[Magnify from AF Point]
|
[ON] / |
|
Displays the point focused with AF. Enlarges the AF focus location when enlarging the image.
|
[LUT View Assist (Monitor)]
|
[ON] / |
|
When playing back images recorded with [Photo Style] set to [V-Log], this displays the images with LUT file applied on the monitor/viewfinder.
|
[HLG View Assist (Monitor)]
|
[MODE1] / |
|
At recording or playback of HLG video, this converts their color gamut and brightness for display.
|
[Anamorphic Desqueeze Display]
|
[ |
|
This displays the desqueezed images suited to the magnification of the anamorphic lens on this camera.
|
[Behavior After Video Playback]
|
|
|
Sets the operation for when playback of video finishes. [End Playback]: Ends video playback and returns to the image selection screen. [Pause At Last Frame]: Does not end video playback, but pauses on the final frame. To end video playback, press |
[Playback] ([Process Image])
[RAW Processing]
|
Processes pictures taken in RAW format on the camera and saves them in JPEG format. |
[Time Lapse Video]
|
This creates videos from group images recorded with [Time Lapse Shot].
|
[Stop Motion Video]
|
This creates videos from group images recorded with [Stop Motion Animation].
|
[Playback] ([Add/Delete Info.])
[Protect]
|
[Single] / [Multi] / [Cancel] |
|
You can set protection for images so that they will not be deleted by mistake. However, if you format the card, the protected images will also be deleted.
|
[Rating]
|
[Single] / [Multi] / [Cancel] |
|
If you set any of the five different rating levels for images, you can do the following:
|
[Playback] ([Edit Image])
|
|
[Resize]
|
[Single] / [Multi] |
|
Reduce the picture size of JPEG images and save them as different images to enable them to be easily used for web pages or sent as email attachments.
– When [Single] is selected, after choosing the image, press – When [Multi] is selected, before choosing the images, press
– Video recording – Group images – [65:24]/[2:1] ([Aspect Ratio]) – [RAW] ([Picture Quality]) – Pictures created from [C4K] video – [S] ([Picture Size]) |
[Rotate]
|
Rotate images manually in 90 [ [
|
[Video Divide]
|
Divide a recorded video into two. |
[Copy]
|
[Copy Direction] |
|
|
[Select Copy] / [Copy All in Folder] / [Copy All in Card] |
|
|
You can copy the images in one of the cards to the other card.
[Select Copy]: Copies selected images.
[Copy All in Folder]: Copies all images in a folder.
[Copy All in Card]: Copies all images in the card. Using the Fn button to copy images If you press the Fn button with [Copy] assigned while playing back images one at a time, the image currently being played back will be copied to the other card. (
[Same Folder Number as Source]: Copies to a folder with the same name as the folder of the image to be copied. [Create a New Folder]: Creates a new folder with an incremented folder number and then copies the image to it. [Select Folder]: Selects a folder to store the image and then copies the image to it.
– Copying from an SDXC memory card to an SD/SDHC memory card |
|
[Playback] ([Others])
|
|
[Delete Confirmation]
|
["Yes" first] / |
|
This sets which option, [Yes] or [No], will be highlighted first when the confirmation screen for deleting an image is displayed. ["Yes" first]: [Yes] is highlighted first. ["No" first]: [No] is highlighted first. |
[Delete All Images]
|
|
|
Deleting all images in a card.
|


 : Adjusts the volume
