Connecting to a Smartphone
 Connecting to a Smartphone (Bluetooth Connection)
Connecting to a Smartphone ([Wi-Fi connection])
Sending Images on the Camera to a Smartphone with Simple Operations
Connect with a smartphone which has the “Panasonic LUMIX Sync” (below: “LUMIX Sync”) smartphone app installed.
Use “LUMIX Sync” for remote recording and image transfers.
Installing “LUMIX Sync”
“LUMIX Sync” is an application for smartphones provided by Panasonic.
|
Supported OS Android™: Android 9 or higher iOS: iOS 14 or higher |
-
Connect the smartphone to a network.
-
(Android) Select “Google Play™ Store”.
(iOS) Select “App Store”.
-
Enter “LUMIX” or “panasonic lumix sync” into the search box.
-
Select and install the “Panasonic LUMIX Sync”
 .
.
|
For information on the “LUMIX Sync”, refer to the following support site: https://panasonic.jp/support/global/cs/dsc/ (English only) |
Connecting to a Smartphone (Bluetooth Connection)
Follow a simple connection setup procedure (pairing) to connect to a smartphone that supports Bluetooth Low Energy.
When pairing is set up, the camera also automatically connects to the smartphone via Wi-Fi.
 For the first-time connection, pairing settings are required.
For information about connecting for the second and subsequent times ( Connecting to a Paired Smartphone)
|
Supported smartphones Android™: Android 9 or higher with Bluetooth 4.0 or higher (excluding those that do not support Bluetooth Low Energy) iOS: iOS 14 or higher
|
-
On the smartphone, start up “LUMIX Sync”.
A message regarding device (camera) registration is displayed. Select [Next].

If you have closed the message, select [![]() ], then register the camera using [Camera registration (pairing)].
], then register the camera using [Camera registration (pairing)].

-
Check the content in the displayed guide and select [Next] until the screen to register the camera is displayed.
Operating the camera in accordance with the smartphone guide.
-
Set the camera to Bluetooth pairing standby state.

![]() [
[![]() ]
] ![]() [
[![]() ]
] ![]() [Bluetooth]
[Bluetooth] ![]() [Bluetooth]
[Bluetooth] ![]() [SET]
[SET] ![]() [Pairing]
[Pairing]
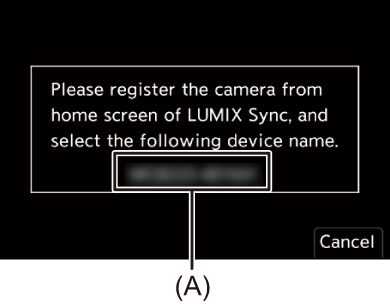
The camera enters pairing standby state and the device name (A) is displayed.
-
On the smartphone, select the camera’s device name.
(iOS devices) When a message to confirm the change of destination is displayed, select [Join].

-
When a message indicating that device registration is complete, select [OK].
A Bluetooth connection between the camera and the smartphone will be made.

|
When the Bluetooth function is enabled, but a connection is not established with the smartphone, [
If you try to register more than 16 smartphones, the registration information will be deleted from the oldest first. |
 End Bluetooth Connection
To terminate the Bluetooth connection, turn off the Bluetooth function of the camera.
![]() [
[![]() ]
] ![]() [
[![]() ]
] ![]() [Bluetooth]
[Bluetooth] ![]() [Bluetooth]
[Bluetooth] ![]() Select [OFF]
Select [OFF]
|
|
Connecting to a Paired Smartphone
Connect paired smartphones using the following procedure.
-
Enable the Bluetooth function of the camera.
![]() [
[![]() ]
] ![]() [
[![]() ]
] ![]() [Bluetooth]
[Bluetooth] ![]() [Bluetooth]
[Bluetooth] ![]() [ON]
[ON]
-
On the smartphone, start up “LUMIX Sync”.
If a message is displayed indicating that the smartphone is searching for cameras, close the message.
-
Select [
 ].
].

-
Select [Bluetooth Setup].
-
Turn Bluetooth ON.
-
From [Registered camera(s)] items, select the camera’s device name.

|
|
Canceling Pairing
-
Cancel the pairing setting of the camera.
![]() [
[![]() ]
] ![]() [
[![]() ]
] ![]() [Bluetooth]
[Bluetooth] ![]() [Bluetooth]
[Bluetooth] ![]() [SET]
[SET] ![]() [Delete]
[Delete]
-
Select the smartphone for which to cancel the pairing.
|
|
Connecting to a Smartphone ([Wi-Fi connection])
Use Wi-Fi to connect the camera and a smartphone.
With default settings, simple connection with smartphones is possible without entering a password.
You can also use password authentication for enhanced connection security.
A third party may be able to intercept your transmissions if you do not use password authentication. When recording or transmitting important images, we recommend using password authentication. (Using Password Authentication to Connect)
-
Set the camera to Wi-Fi connection standby status.
![]() [
[![]() ]
] ![]() [
[![]() ]
] ![]() [Wi-Fi]
[Wi-Fi] ![]() [Wi-Fi Function]
[Wi-Fi Function] ![]() [New Connection]
[New Connection] ![]() [Control With Smartphone]
[Control With Smartphone]
The SSID (B) of the camera is displayed on the screen.
You can also perform the same operation by pressing the Fn button assigned with [Wi-Fi]. (Fn Buttons)

-
In the setting menu of the smartphone, turn the Wi-Fi function ON.
-
Select the SSID displayed on the camera.

-
On the smartphone, start up “LUMIX Sync”.
-
(At the first connection) Confirm the device name displayed on the camera and then select [Yes].
|
If there are other Wi-Fi connection devices nearby, we recommend using either QR code or manual password input to connect with password authentication. (
– [Auto Transfer] |
Using Password Authentication to Connect
You can enhance Wi-Fi connection security by using password authentication through either QR code or manual input.
Scanning QR code to connect
-
Set [Wi-Fi Password] on the camera to [ON].
![]() [
[![]() ]
] ![]() [
[![]() ]
] ![]() [Wi-Fi]
[Wi-Fi] ![]() [Wi-Fi Setup]
[Wi-Fi Setup] ![]() [Wi-Fi Password]
[Wi-Fi Password] ![]() [ON]
[ON]
-
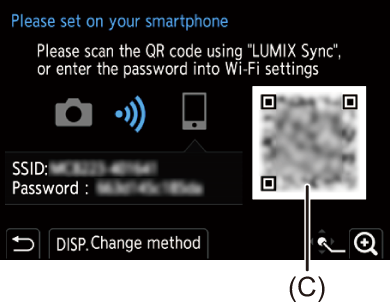
Display the QR code (C).
![]() [
[![]() ]
] ![]() [
[![]() ]
] ![]() [Wi-Fi]
[Wi-Fi] ![]() [Wi-Fi Function]
[Wi-Fi Function] ![]() [New Connection]
[New Connection] ![]() [Control With Smartphone]
[Control With Smartphone]
You can also perform the same operation by pressing the Fn button assigned with [Wi-Fi]. (Fn Buttons)
Press or  to enlarge the QR code.
-
On the smartphone, start up “LUMIX Sync”.
If a message is displayed indicating that the smartphone is searching for cameras, close the message.
-
Select [
].
-
Select [Wi-Fi connection].
-
Select [QR code].
-
Scan the QR code displayed on the screen of the camera using “LUMIX Sync”.
(iOS devices) When a message to confirm the change of destination is displayed, select [Join].
Manually entering a password to connect
-
Display the screen in Step 2 (
Scanning QR code to connect).
-
In the setting menu of the smartphone, turn the Wi-Fi function ON.
-
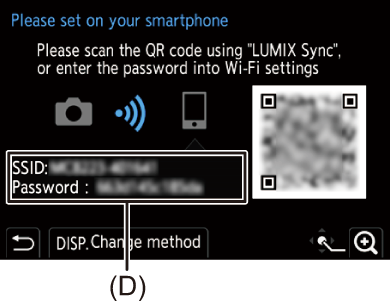
On the Wi-Fi setup screen, select the SSID (D) displayed on the camera.
-
(At the first connection) Enter the password (D) displayed on the camera.
-
On the smartphone, start up “LUMIX Sync”.
Connection Methods Other Than the Default Settings
When connecting with [Via Network], or [WPS Connection] in [Direct], follow the steps below:
-
Display the connection method setting screen for the camera.
![]() [
[![]() ]
] ![]() [
[![]() ]
] ![]() [Wi-Fi]
[Wi-Fi] ![]() [Wi-Fi Function]
[Wi-Fi Function] ![]() [New Connection]
[New Connection] ![]() [Control With Smartphone]
[Control With Smartphone]
-
Press [DISP.].
Connecting via network
-
Select [Via Network] and then press
or .
Connect the camera to a wireless access point. ([Via Network])
-
In the setting menu of the smartphone, turn the Wi-Fi function ON.
-
Connect the smartphone to the wireless access point that the camera is connected to.
-
On the smartphone, start up “LUMIX Sync”.
Connecting directly
-
Select [Direct] and then press
or .
Select [WPS Connection] to connect the camera to a smartphone. ([Direct])
-
On the smartphone, start up “LUMIX Sync”.
Terminating the Wi-Fi Connection
To end the Wi-Fi connection between the camera and smartphone, follow the steps below.
-
Press the shutter button halfway to put the camera in recording mode.
-
Terminate the Wi-Fi connection.
![]() [
[![]() ]
] ![]() [
[![]() ]
] ![]() [Wi-Fi]
[Wi-Fi] ![]() [Wi-Fi Function]
[Wi-Fi Function] ![]() [Yes]
[Yes]
You can also perform the same operation by pressing the Fn button assigned with [Wi-Fi]. (Fn Buttons)
-
On the smartphone, close the “LUMIX Sync”.
Sending Images on the Camera to a Smartphone with Simple Operations
You can transfer pictures to a smartphone connected by Bluetooth just by pressing [Q] during playback.
You can also use the menu to connect easily.
You can also perform the same operation by pressing the Fn button registered with [Send Image (Smartphone)]. (Fn Buttons)
Getting started:
Install “LUMIX Sync” on your smartphone. (Installing “LUMIX Sync”)
Connect the camera to a smartphone by Bluetooth. (Connecting to a Smartphone (Bluetooth Connection))
Press [ ] on the camera to display the playback screen.
Send a single image
-
Press

 to select the image.
-
Press [Q].
-
Select [Single Select].
To change the send settings of images, press [DISP.]. (Image Send Settings)
-
On the smartphone, select [Yes] (for Android devices) or [Join] (for iOS devices).
This connects automatically using Wi-Fi.
Send multiple images
-
Press [Q].
-
Select [Multi Select].
To change the send settings of images, press [DISP.]. (Image Send Settings)
-
Select the images and then transfer.
: Select images
or : Set/Cancel
[DISP.]: Transfer
-
On the smartphone, select [Yes] (for Android devices) or [Join] (for iOS devices).
This connects automatically using Wi-Fi.
Using the menu to transfer easily
![]() [
[![]() ]
] ![]() [
[![]() ]
] ![]() [Bluetooth]
[Bluetooth] ![]() [Send Image (Smartphone)]
[Send Image (Smartphone)]
Settings: [Single Select]/[Multi Select]
If [Single Select], press to select the image and then press or to execute.
If [Multi Select], use the same operation as with “Send multiple images”. (Send multiple images)
|
– [MOV] videos, [Apple ProRes] videos
– [Auto Transfer] |