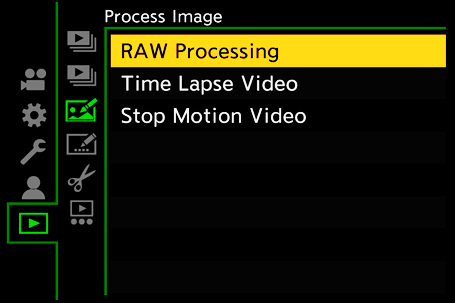
[RAW Processing]
This processes pictures taken in RAW format on the camera and saves them in JPEG format.
-
Select [RAW Processing].


![]() [
[![]() ]
] ![]() [
[![]() ]
] ![]() [RAW Processing]
[RAW Processing]
-
Select the RAW image.
Press 
 to select an image and then press or
  .
.
 When group images are selected, press
  and then select an image in the group.
Press again to return to the normal selection screen.
The settings from the time of recording are reflected in displayed images.
-
Select a setting item.
Press  to select an item and then press or .
-
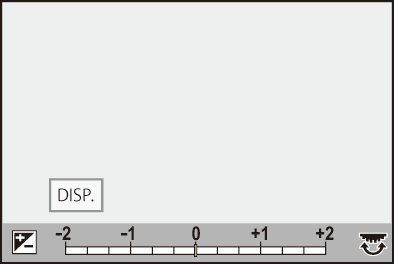
Change the setting.
Rotate  ,
,  , or
, or  .
.
The image can be enlarged/reduced by pinching out/pinching in the screen.
-
Confirm the setting.
Press or .
The screen of Step 3 reappears.
To set another item, repeat Steps 3 to 5.
-
Save the image.
Press to select [Begin Processing] and then press or .
 Setting Items ([RAW Processing])
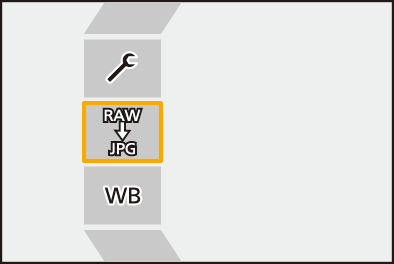
[Begin Processing]
Saves the image.
![]() [White Balance]
[White Balance]
Selects and adjusts the white balance.
Selecting the item with [![]() ] enables processing with the same setting as at the time of recording.
] enables processing with the same setting as at the time of recording.
If you press in the [White Balance] selection screen, the white balance adjustment screen appears. ( Adjusting the White Balance)
If you press while [![]() ] to [
] to [![]() ] is selected, the color temperature setting screen appears. (Color Temperature Setting)
] is selected, the color temperature setting screen appears. (Color Temperature Setting)
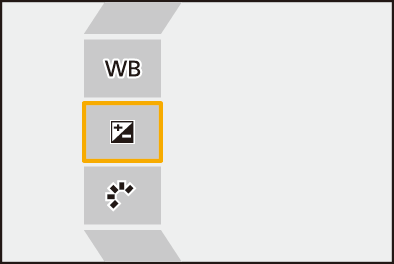
![]() [Brightness correction]
[Brightness correction]
Corrects the brightness.
The [Brightness correction] effect differs from the effect of exposure compensation during recording.
![]() [Photo Style] ([Photo Style])
[Photo Style] ([Photo Style])
Selects a Photo Style.
If you press [Q] while [Like709] is selected, the knee setting screen appears. (Recording While Controlling Overexposure (Knee))
You cannot select a Photo Style for images recorded with [V-Log]. You cannot select [V-Log] for images not recorded with [V-Log].
You cannot select a Photo Style other than [Cinelike D2] or [Cinelike V2] for images recorded with [Cinelike D2] or [Cinelike V2]. You cannot select [Cinelike D2] or [Cinelike V2] for images not recorded with Photo Style [Cinelike D2] or [Cinelike V2].
[REAL TIME LUT] cannot be selected. The Photo Style is fixed to [V-Log] for images recorded with [REAL TIME LUT].
![]() [i.Dynamic Range]
[i.Dynamic Range]
Selects the setting of [i.Dynamic Range].
![]() [Contrast]
[Contrast]
Adjusts the contrast.
![]() [Highlight]
[Highlight]
Adjusts the brightness of bright portions.
![]() [Shadow]
[Shadow]
Adjusts the brightness of dark portions.
![]() [Saturation]/[Color Tone]
[Saturation]/[Color Tone]
Adjusts the saturation or color tone.
![]() [Hue]
[Hue]
Adjusts the hue.
![]() [Filter Effect]
[Filter Effect]
Selects filter effects.
![]() [Grain Effect]
[Grain Effect]
Selects a grain effect setting.
![]() [Color Noise]
[Color Noise]
Adds color to the grain effect.
![]() [Noise Reduction]
[Noise Reduction]
Sets noise reduction.
![]() [Sharpness]
[Sharpness]
Adjusts the sharpness.
![]() [LUT]
[LUT]
Selects the LUT file registered in [LUT Library]. ([LUT Library])
[More Settings]
[Revert To Original]: Returns the settings to the ones from the time of recording.
[Color Space]: Selects a Color Space setting from [sRGB] or [AdobeRGB]. ([Color Space])
[Picture Size]: Selects the size for storing images.
[Destination Card Slot]: You can select the card slot to which to save images processed with RAW. When [AUTO] is selected, the image is saved to the same card slot as the RAW format image to be processed.
The items that can be adjusted depend on the selected [Photo Style].
|
|
|
|
|
|
|
|
|
|
|
|
|
|
|
|
|
|
|
|
|
|
|
|
|
|
|
|
|
|
|
|
|
|
|
|
|
|
|
|
|
|
|
|
|
|
|
|
|
|
|
|
|
|
|
|
|
([Saturation]) |
|
|
|
|
|
|
([Color Tone]) |
|
|
|
|
|
|
|
|
|
|
|
|
|
|
|
|
|
|
|
|
|
|
|
|
|
|
|
|
|
|
|
|
|
|
|
|
|
|
|
|
|
|
|
|
|
|
|
|
|
|
|
|
|
|


-
Can be set when [Grain Effect] is one of [Low], [Standard], or [High].
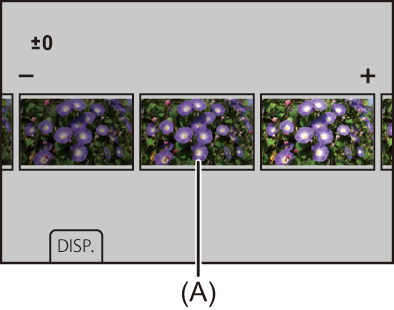
Displaying a Comparison Screen
You can change a setting while checking the effect by displaying images with the applied setting value side by side.
-
Press [DISP.] in the screen of Step 4.
The image with the current setting (A) is displayed at the center.
Touching the image with the current setting enlarges it.
Touching [![]() ] returns to the original display.
] returns to the original display.
A comparison screen cannot be displayed while [Noise Reduction] or [Sharpness] is selected.
-
Rotate
, , or to change the setting.
-
Press
or to confirm the setting.
|
(However, RAW images recorded in High Resolution mode are recorded in the [XL] size of [4:3])
– HDMI output |