![]()
![]()
Change the unit’s settings if necessary. The settings remain intact even if you switch the unit to standby.
Some items in the Setup menu are common to the Option menu. You can get the same effect with both menus.
![]() : Settings of the items with this indication are saved by the respective users registered in the HOME menu.
: Settings of the items with this indication are saved by the respective users registered in the HOME menu.
Please refer to “Multi User Mode” for details about user registration and switching.
1While displaying the HOME menu, press [SETTINGS].
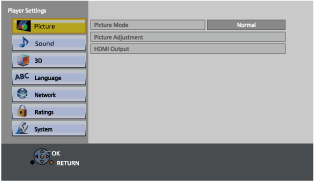
2Select an item and change the settings.
 “Picture Mode” “Picture Adjustment”
Press [OK] to show the following settings:
The items supported by the connected devices are indicated on the screen as “ ”. When any item without “” is selected, the images may be distorted.
If “Automatic” is selected, the best suited output resolution to the connected TV is automatically selected.
To enjoy high-definition video up-converted to 1080p, you need to connect the unit directly to 1080p compatible HDTV (High Definition TV). If this unit is connected to an HDTV through other equipment, the other equipment must also be 1080p compatible.
You can listen at low volumes but still hear dialog clearly.
Select the downmix system of multi-channel to 2-channel sound.
Select “Surround encoded”, when the connected equipment supports the virtual surround function.
The downmix effect is not available when “Digital Audio Output” is set to “Bitstream”.
Set to display or hide the 3D viewing warning screen when playing back 3D images.
Select a suitable item according to the language used for MKV/Xvid subtitles text.
“Easy Network Setting”Perform network-related settings individually.
Press [OK] to show the following settings:
Select the LAN connection method.
Select “Wireless Master” when you make a direct wireless connection between this unit and a Home Network device. Internet connection is not available when this item is selected.
This allows the wireless router and connection settings to be set. Current connection settings and connection state can be checked.
Press [OK] to show the following settings:
The wireless router connection wizard will be displayed.
Double Speed Mode Setting (2.4GHz)
Set the connection speed for a 2.4 GHz wireless format.
If you connect using the “Double Speed Mode (40MHz)”, 2 channels use the same frequency band, and there is consequently a greater risk of reception interference. This can cause the connection speed to drop or become unstable.
This is for checking the state of the network connection and setting the IP address and DNS-related.
This is for checking the state of connection with the Proxy server and performing settings.
“Enjoying Network Service”Press [OK] to show the following settings:
Set the unit’s time to match your location.
Some Network Service contents require the time zone to be set. Set the time zone if necessary.
It is possible to access the shared folder of equipment not compatible with DLNA, such as the Windows XP operating system, and play back video, still pictures, and music on this unit.
For the setting and operation method of connected equipment, refer to the following website.
http://panasonic.jp/support/global/cs/
“Using the Digital Media Controller”Press [OK] to show the following settings:
If “On” is selected, “Quick Start” will be activated.
Set the name of this unit to be displayed on the connected equipment.
Registering/deregistering of the displayed equipment can be performed when “Manual” in “Registration Type” is selected.
Press [OK] to show the following settings:
Set to match the type of TV connected.
When connected to a 4:3 aspect TV and playing 16:9 ratio image:

|
|

|
When connected to a 16:9 widescreen TV and playing 4:3 ratio image:
Speed of start-up from standby mode is increased.
When set to “On”, the internal control unit will be powered and the idle power consumption will increase so compared to when set to “Off”. (About the power consumption “Specifications”)
Change the remote control code if other Panasonic products react to this remote control.
“Firmware updates”