Attaching accessories
 Attaching the eye cup [X2100]/[X1600]
Attaching the handle unit [X2100]/[X1600]
Attaching the external microphone
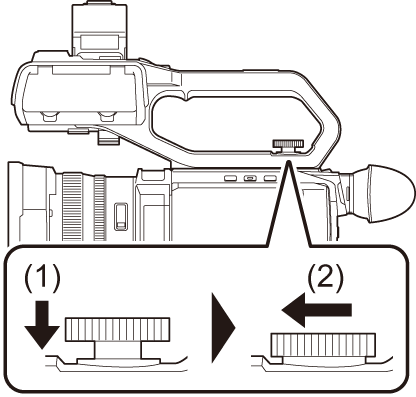
Adjusting the grip belt
 Adjust the grip belt so that it fits the size of your hand.
If the buckle is difficult to tighten, move the pad backward and tighten the buckle again.
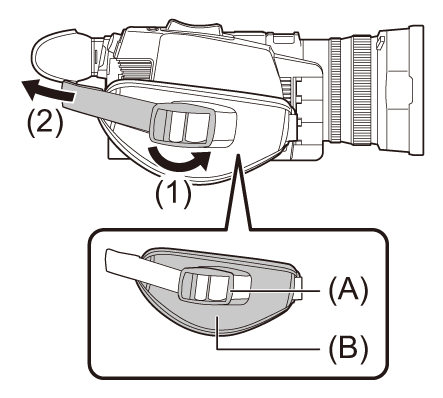
(A) Buckle
(B) Pad
-
Open the buckle section.
-
Pull the end of the belt.
Attaching the lens hood
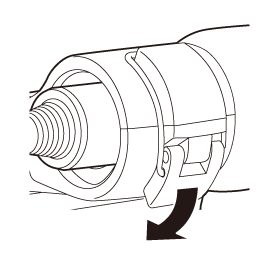
 Removing
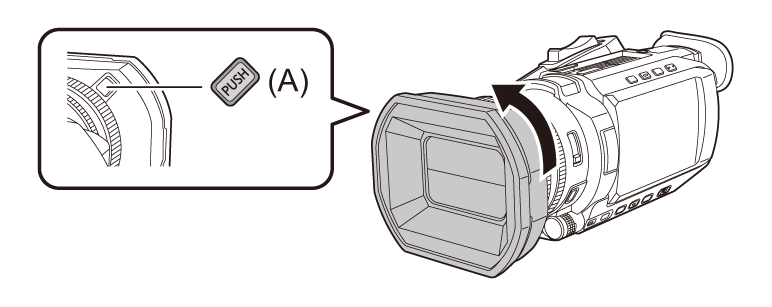
(A) Lens hood release button
-
While pressing the lens hood release button, turn the lens hood in the direction of the arrow to remove it.
Attaching
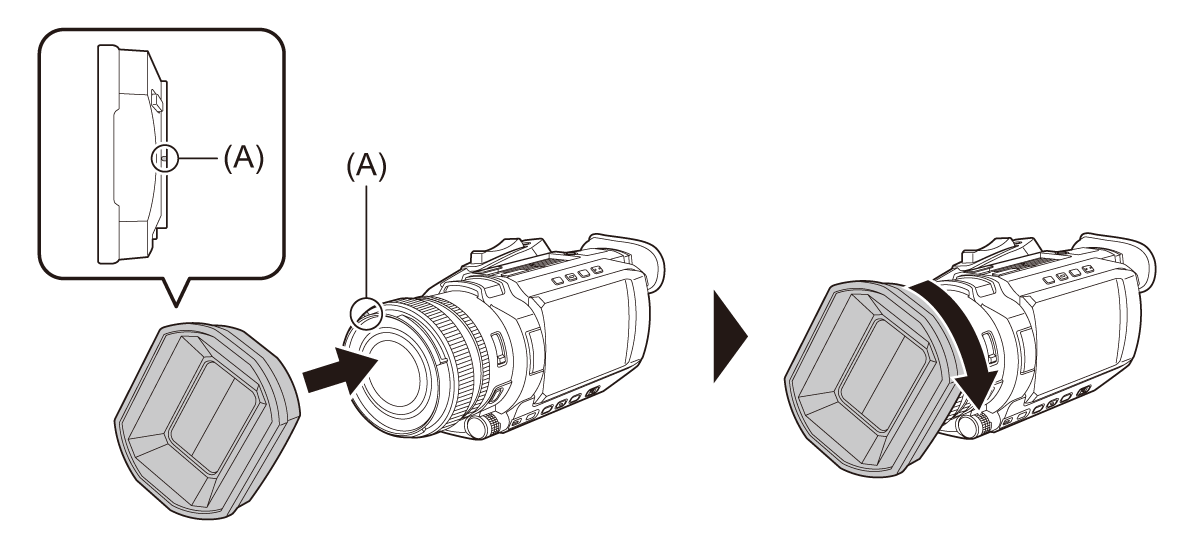
(A) Mounting mark
-
Insert the lens hood into the unit.
Align the mounting marks on the lens hood and unit.
-
Turn the lens hood clockwise.
Turn until the lens clicks and locks into place.
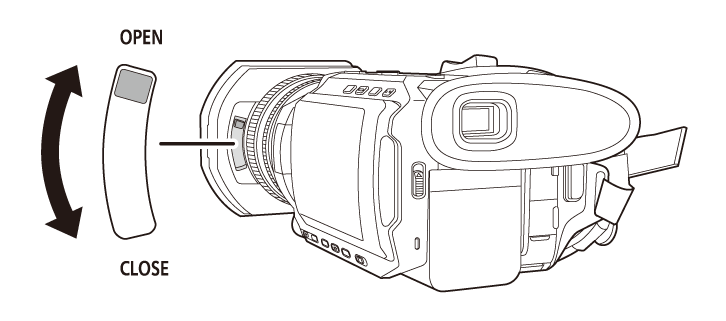
Opening and closing the lens cover
Use the lens cover opening and closing lever to open and close the lens cover.
Open the lens cover when shooting.
When not using the unit, close the lens cover in order to protect the lens.
|
|
Attaching the eye cup [X2100]/[X1600]
-
Attach the eye cup by aligning the groove on the mounting part of the eye cup with the inner ridge of the eye cup.
The illustration below is an example of attaching the eye cup to use it with your right eye. If you rotate the eye cup to the left by 180° before attaching it, you can use it with your left eye.
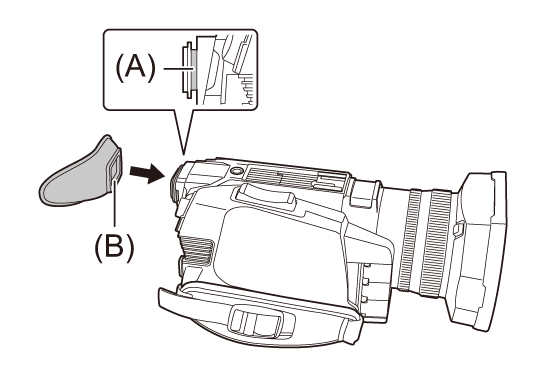
(A) Groove
(B) Ridge
Attaching the handle unit [X2100]/[X1600]
![]() uses the supplied accessory.
uses the supplied accessory.
![]() uses the optional VW-HU1.
uses the optional VW-HU1.
![]() does not support the handle unit.
does not support the handle unit.
Press the power button to turn off the unit. ( Turning the unit on/off)
-
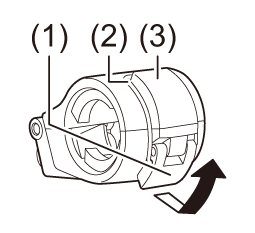
Open the microphone holder.
Open buckle (1), and detach fitting (2) from hook (3).
-
Attach the microphone holder to the microphone holder mounting section on the handle unit.
Attach using a commercially-available screwdriver.
There will be some rubbing noises with the rubber when screwing in the microphone holder mounting screws, but please ensure they are done up tightly.
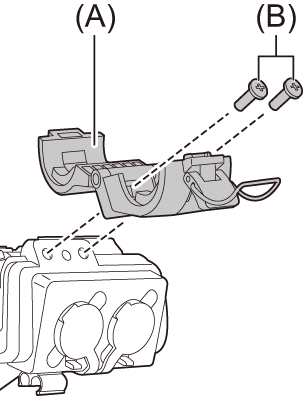
(A) Microphone holder
(B) Microphone holder mounting screws
-
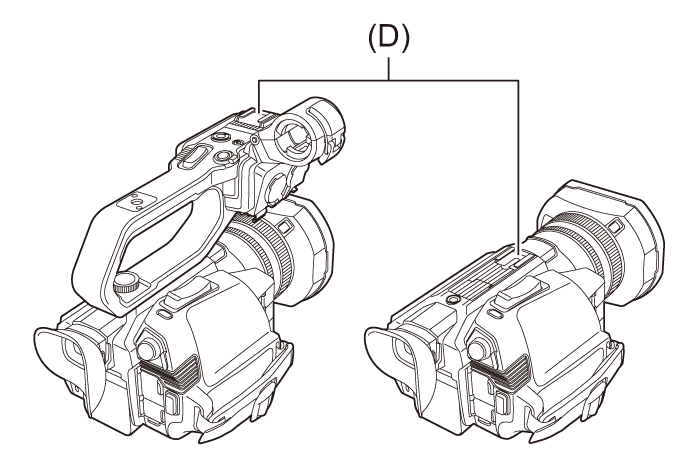
Push the handle unit into the handle unit mounting section on the camera.
Match the positions of mounting mark (C) on the handle unit and mounting mark (D) on the camera when pushing in.

-
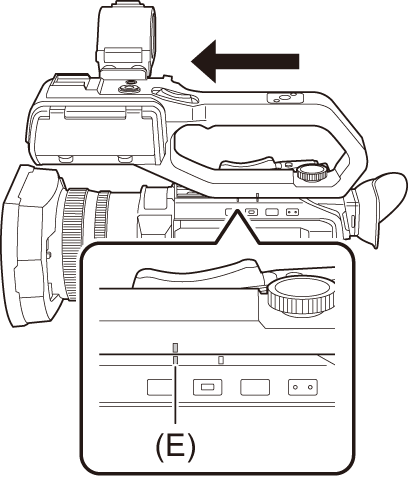
Slide the handle unit in the direction indicated by the arrow.
Slide up to mounting mark (E).
-
While pressing the handle unit mounting screw down, turn it in the direction indicated by arrow (2) until it stops.
How to remove
Remove by doing the steps for attaching in reverse.
|
|
Attaching the external microphone
Attaching an external microphone to the <INPUT 1>/<INPUT 2> terminals ![]() /
/![]()
When the handle unit (![]() supplied,
supplied, ![]() optional) is attached to the unit, you can attach an external microphone such as a unidirectional microphone AG-MC200G (optional) that is compatible with XLR terminals to the handle.
optional) is attached to the unit, you can attach an external microphone such as a unidirectional microphone AG-MC200G (optional) that is compatible with XLR terminals to the handle.
-
Open the microphone holder.
-
Attach the external microphone to the microphone holder, then close the buckle to secure the external microphone.
Attach the fitting to the hook and close the buckle in the direction indicated by the arrow.
-
Connect the microphone cable to the <INPUT 1> terminal.
-
Attach the microphone cable to the microphone cable clamp.
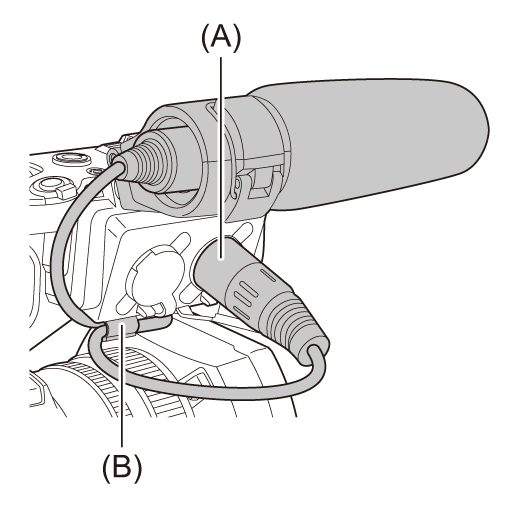
(A) <INPUT 1> terminal
(B) Microphone cable clamp
-
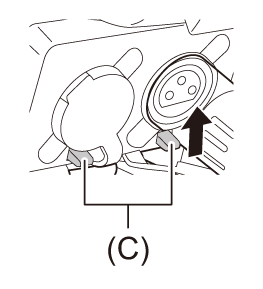
Switch the <INPUT1> switch to match the microphone to be connected.
|
(C) Levers |
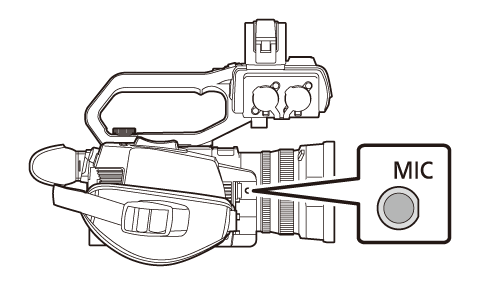
Attaching an external microphone to the <MIC> terminal
You can attach an external microphone, such as a Stereo Microphone VW-VMS10 (optional), etc., that is compatible with the stereo mini jack.
Some optional accessories may not be available in some countries.
-
Attach the external microphone to the accessory shoe.
For details about how to attach the external microphone, refer to the operating instructions for the external microphone.
(D) Accessory shoe
-
Connect the microphone cable to the <MIC> terminal.
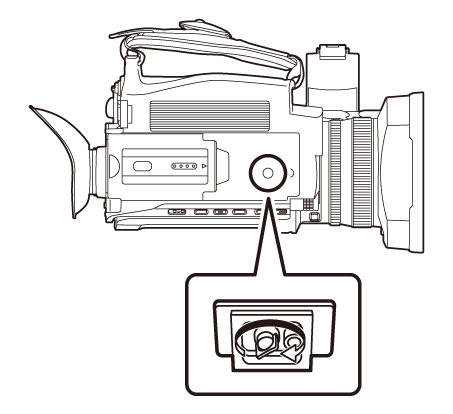
Attaching a tripod
The tripod mounting holes accept 1/4-20 UNC screws.
|
|
