Synchronizing the Time Code with an External Device
 Preparations for Time Code Synchronization
Synchronize the Time Code of the Camera with That of the External Device (TC IN)
![]()
![]()
![]()
![]()
![]()
![]()
![]()
![]()
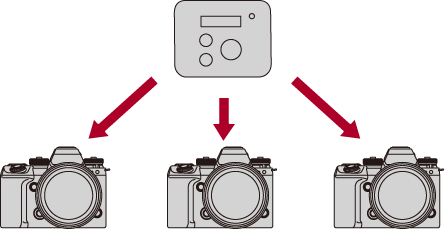
Synchronize the time code default value with an external device that supports time code output via a Bluetooth connection with this camera.
 It is compatible with the ATOMOS UltraSync BLUE.
Refer to the website below for firmware versions that support UltraSync BLUE:
https://panasonic.jp/support/global/cs/dsc/connect/index.html
(English only)
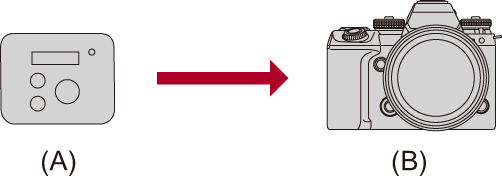
(A) Time code output
(B) Time code input
Preparations for Time Code Synchronization
When [Count Up] is set to [FREE RUN] in the [![]() ] mode, you can synchronize the initial value of the time code with an external device.
] mode, you can synchronize the initial value of the time code with an external device.
-
Set to [
 ] mode.
-
Set [Count Up] to [FREE RUN].

![]() [
[![]() ]
] ![]() [
[![]() ]
] ![]() [Time Code]
[Time Code] ![]() [Count Up]
[Count Up] ![]() [FREE RUN]
[FREE RUN]
-
Set the camera to Bluetooth pairing standby state.
![]() [
[![]() ]
] ![]() [
[![]() ]
] ![]() [Time Code]
[Time Code] ![]() [External TC Setting]
[External TC Setting] ![]() [Bluetooth]
[Bluetooth] ![]() [ON]
[ON]
The camera enters the pairing standby state.
If there is a paired external device, the camera enters the connection standby state. If you want to pair with a new external device, use the following procedure to put the camera in the pairing standby state.
![]() [
[![]() ]
] ![]() [
[![]() ]
] ![]() [Bluetooth]
[Bluetooth] ![]() [Pairing]
[Pairing] ![]() [ATOMOS Wireless TC]
[ATOMOS Wireless TC]
-
Pair with the camera on the external device.
|
When the Bluetooth function is enabled, but a connection is not established with the external device, [
– [Frame.io Connection] |
 End Bluetooth Connection
To terminate the Bluetooth connection, turn off the Bluetooth function of the camera.
![]() [
[![]() ]
] ![]() [
[![]() ]
] ![]() [Bluetooth]
[Bluetooth] ![]() [Bluetooth Function]
[Bluetooth Function] ![]() Select [OFF]
Select [OFF]
|
|
Canceling Pairing
-
Cancel the pairing setting of the camera.
![]() [
[![]() ]
] ![]() [
[![]() ]
] ![]() [Bluetooth]
[Bluetooth] ![]() [Pairing]
[Pairing] ![]() [Delete]
[Delete]
-
Select the external device for which to cancel the pairing.
|
|
Synchronize the Time Code of the Camera with That of the External Device (TC IN)
The initial time code value of the camera is synchronized according to the time code signal (LTC signal) of the external device.
|
|
-
Prepare for time code synchronizing.
( Preparations for Time Code Synchronization)
-
Operate the external device to output the time code signal.
When synchronized with the time code of an external device, this camera is in a slave state, and the [![]() ] of the time code shown on the screen switches to [
] of the time code shown on the screen switches to [![]() ].
].
|
|
Maintaining, Releasing, and Restoring the Slave State
The camera is not released from the slave state even if the Bluetooth connection is terminated.
Perform one of the following operations to release the camera from the slave state.
– Operate the camera on/off switch
– Switch to the [![]() ] or [S&Q] mode
] or [S&Q] mode
– Change the [System Frequency]
– Change the following [Time Code] setting items:
[Count Up], [Time Code Value], [Time Code Mode]
– Switch the [Rec Quality] between 119.88p/59.94p/29.97p and a different recording frame rate
To restore the slave state, re-establish the Bluetooth connection with the external device while set as follows.
The time code signal (LTC signal) can be input just by connecting.
– [![]() ] mode
] mode
– [Count Up] ([Time Code]): [FREE RUN]
|
|