AF Area Movement Operation
 Moving the AF Area Position with the Touch Pad
 [Focus Switching for Vert / Hor]
![]()
![]()
![]()
![]()
![]()
![]()
![]()
![]()
In default settings, you can use the joystick to directly move and change the size of the AF area when recording.
-
Move the position of the AF area.
 On the recording screen, tilt the joystick.


 Pressing
  enables switching between the default and set AF area positions.
In [![]() ], this operation displays the enlarged screen.
], this operation displays the enlarged screen.

-
Change the size of the AF area.
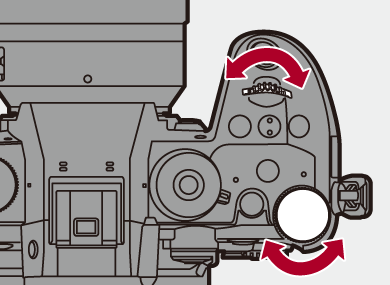
 Rotate
  ,
,  or
or  .
.
 The first press of [DISP.] returns the AF area position to the center. The second press returns the size of the AF area to the default.

-
Confirm your selection.
 Press the shutter button halfway.
 This will return you to the recording screen.
|
|
Moving the AF Area by Touch
You can move the AF area to a touched position on the monitor.
You can also change the size of the AF area.

 [
[![]() ]
]  [
[![]() ]
]  [Touch Settings]
  Select [Touch AF]
[AF]
This focuses on the touched subject.
[AF+AE]
This focuses on and adjusts brightness for the touched subject.
 The default setting is [AF].
 Focus on the Touched Position ([AF])
-
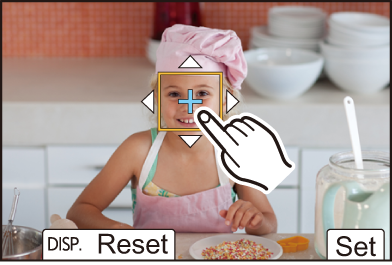
Touch the subject.
 The AF area moves to the touched position.
-
Pinch out/pinch in to change the AF area size.
 The first touch of [Reset] returns the AF area position to the center.
The second touch returns the size of the AF area to the default.
-
Touch [Set].
 In [
In [![]() ], touch [Exit].
], touch [Exit].
 For [
For [![]() ], the AF area setting is canceled if you touch [
], the AF area setting is canceled if you touch [![]() ] on the recording screen.
] on the recording screen.
 Focus on and Adjust Brightness for the Touched Position ([AF+AE])
-
Touch the subject to which you wish to adjust the brightness.
 At the touched position, an AF area that works in the same way as [
![]() ] is displayed.
] is displayed.
This places a point to adjust brightness at the center of the AF area.

-
Pinch out/pinch in to change the AF area size.
 The first touch of [Reset] returns the AF area position to the center. The second touch returns the size of the AF area to the default.
-
Touch [Set].
 The [AF+AE] setting is canceled if you touch [
![]() ] (when [
] (when [![]() ] or [
] or [![]() ] is set: [
] is set: [![]() ]) on the recording screen.
]) on the recording screen.
Moving the AF Area Position with the Touch Pad
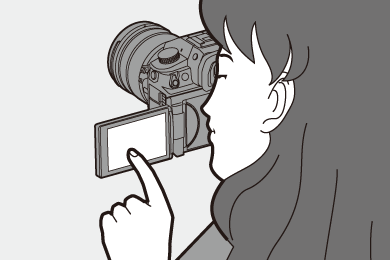
During viewfinder display, you can touch the monitor to change the position and size of the AF area.
-
Set [Touch Pad AF].


 [
[![]() ]
]  [
[![]() ]
]  [Touch Settings]
  [Touch Pad AF]
  [EXACT]/[OFFSET1] to [OFFSET7]
-
Move the position of the AF area.
 During viewfinder display, touch the monitor.

-
Change the size of the AF area.
 Rotate
  ,
,  or
or  .
.
 The first press of [DISP.] returns the AF area position to the center. The second press returns the size of the AF area to the default.
-
Confirm your selection.
 Press the shutter button halfway.
 Setting Items ([Touch Pad AF])
[EXACT]
Moves the AF area of the viewfinder by touching a desired position on the touch pad.

[OFFSET1] (entire area)/[OFFSET2] (right half)/[OFFSET3] (upper right)/[OFFSET4] (lower right)/[OFFSET5] (left half)/[OFFSET6] (upper left)/[OFFSET7] (lower left)
Moves the AF area of the viewfinder according to the distance you drag your finger on the touch pad.
Select the range to be detected with the drag operation.

[OFF]
[Focus Switching for Vert / Hor]
Memorizes separate positions for AF areas for when the camera is vertically aligned and for when it is horizontally aligned.
Two vertical orientations, left and right, are available.


 [
[![]() ]
]  [
[![]() ]
]  Select [Focus Switching for Vert / Hor]
[ON]
Memorizes separate positions for vertical and horizontal orientations.
[OFF]
Sets the same position for vertical and horizontal orientations.
|
|

