- 12. Remote Operations
- Tethered Recording
- Operating the Camera from a PC
Operating the Camera from a PC
Connect the camera and PC with a USB connection cable, LAN cable or Wi-Fi.
|
When connecting the camera directly to a PC with a USB connection cable or LAN cable, you can connect to “LUMIX Tether” with the default setting. Proceed to step 2. (Operate from step 1 if you change the default setting of [LAN / Wi-Fi] or [USB Mode] in the [Setup] ([IN/OUT]) menu.) When connecting with Wi-Fi, output the camera menu screen via HDMI/SDI to an external monitor etc. (Connecting the external monitor) |
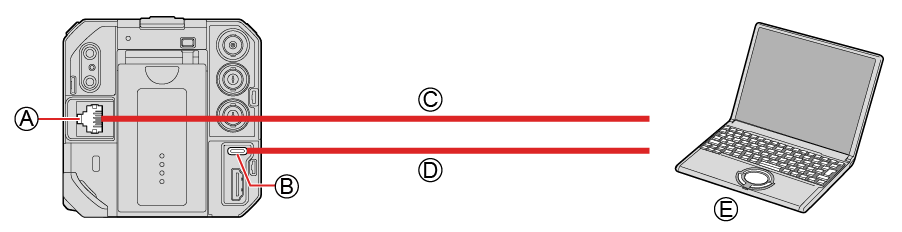
 [LAN] terminal
 [USB] terminal
 LAN cable (commercially available) or
  USB connection cable (commercially available)
 PC (commercially available)
Plug in/out straight holding onto the plug. (Inserting these at an angle may cause deformation or malfunction)
Do not connect the cable to the wrong terminals. This may cause a malfunction.
Preparation:
Turn on the camera and PC.
Install “LUMIX Tether” on PC.
1(When connecting with a USB connection cable)
Set [USB Mode] to [PC(Tether)].
[MENU/SET] ![]() [
[ ]
] ![]() [
[ ]
] ![]() [USB Mode]
[USB Mode] ![]() [PC(Tether)]
[PC(Tether)]
(When connecting with a LAN cable)
Set the camera to DHCP server before setting it to a wired LAN connection setting.
[MENU/SET] ![]() []
[] ![]() []
[] ![]() [LAN / Wi-Fi]
[LAN / Wi-Fi] ![]() [LAN / Wi-Fi Setup]
[LAN / Wi-Fi Setup] ![]() [IP Address Setting (LAN)]
[IP Address Setting (LAN)] ![]() [DHCP Server]
[DHCP Server]
If you changed the setting of [IP Address Setting (LAN)], turn the camera off and then on again.
[MENU/SET] ![]() []
[] ![]() []
[] ![]() [LAN / Wi-Fi]
[LAN / Wi-Fi] ![]() [LAN / Wi-Fi Function]
[LAN / Wi-Fi Function] ![]() [New Connection]
[New Connection] ![]() [Control With LUMIX Tether]
[Control With LUMIX Tether] ![]() [LAN]
[LAN]
(When connecting with Wi-Fi)
Set the camera to a Wi-Fi connection setting.
[MENU/SET] ![]() []
[] ![]() []
[] ![]() [LAN / Wi-Fi]
[LAN / Wi-Fi] ![]() [LAN / Wi-Fi Function]
[LAN / Wi-Fi Function] ![]() [New Connection]
[New Connection] ![]() [Control With LUMIX Tether]
[Control With LUMIX Tether] ![]() [Wi-Fi]
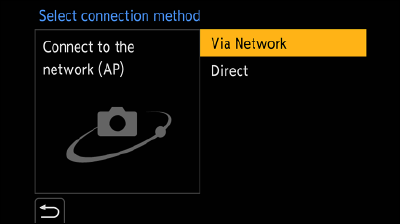
[Wi-Fi] ![]() [Via Network] / [Direct]
[Via Network] / [Direct]
For details about [Via Network] and [Direct]. (Wi-Fi Connections)
Proceed to Step 3.
2Connect the camera and PC with the USB connection cable or LAN cable.
At default setting, the camera is set to DHCP server. By connecting the camera directly to your PC with a LAN cable, you can connect the camera to your PC without manually setting network information such as the IP address.
When using PoE+ power supply with the camera, connect a PoE+ compatible switching hub and PC with a LAN cable.
3Use “LUMIX Tether” to operate the camera from the PC.
(When connecting for the first time with a LAN cable or Wi-Fi)
Set a password to connect to the camera from “LUMIX Tether”. (from 8 to 31 characters)
A tether icon is displayed in the upper right of the screen during recording standby.
Terminating the Network Connection
To terminate the network connection between the camera and PC, follow the steps below.
 On the PC, close the “LUMIX Tether”.
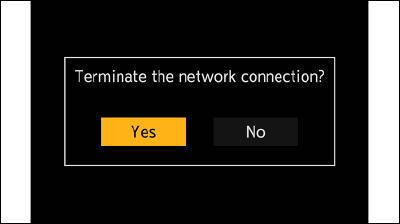
 Terminate the network connection.
[MENU/SET] ![]() []
[] ![]() []
[] ![]() [LAN / Wi-Fi]
[LAN / Wi-Fi] ![]() [LAN / Wi-Fi Function]
[LAN / Wi-Fi Function] ![]() [Yes]
[Yes]
You can also perform the same operation by pressing the Fn button assigned with [LAN / Wi-Fi]. (Fn Button Assigned with [LAN / Wi-Fi])
Operating multiple cameras
You can operate multiple cameras remotely using “LUMIX Tether”.
The connecting method differs depends on whether you set the camera to a setting for DHCP server or DHCP client to connect.

LAN cable (commercially available)
Router (commercially available)
PC (commercially available)
Example: When the DHCP server is within the LAN and the camera is set to DHCP client to connect.
1Set the camera to a DHCP client.
[MENU/SET] ![]() []
[] ![]() []
[] ![]() [LAN / Wi-Fi]
[LAN / Wi-Fi] ![]() [LAN / Wi-Fi Setup]
[LAN / Wi-Fi Setup] ![]() [IP Address Setting (LAN)]
[IP Address Setting (LAN)] ![]() [DHCP Client]
[DHCP Client]
If you changed the setting of [IP Address Setting (LAN)], turn the camera off and then on again.
2Connect all cameras and the router with LAN cables.
3Connect the router and PC with a LAN cable.
4Operate “LUMIX Tether” to operate the camera remotely.
You can set the camera to tether connection mode by operating the camera remotely from “LUMIX Tether”.
If you set the camera to tether connection mode when it is not recording, it enters a connection standby state for LUMIX Tether while maintaining the connection between the camera and PC, and it can quickly return to a state where remote shooting is possible.
The status indicator lights up (orange) during tether connection mode.
For how to operate the software, refer to the operation guide for “LUMIX Tether”.
Taking a still picture
You can take still pictures by operating the camera remotely from the operation panel of “LUMIX Tether”.
When you are recording still pictures you can use the functions which are not available during video recording.
The functions for still pictures are not displayed on the menu screen.
The setting items differ from those during video recording.
Example)
|
Recording mode |
[P] / [A] / [S] / [M] |
|
Shutter speed (sec.) |
1 to 1/16000 |
|
Exposure Compensation |
[±5EV] When the exposure compensation value falls below or exceeds ±3 EV, the brightness of the recording screen will no longer change. |
|
Picture quality |
JPEG (FINE / STD.) |
|
Picture size |
[L] / [M] / [S] |
|
Image Stabilizer |
[Panning] |
|
1 shot AF |
Available |
The following settings are fixed:
–[Aspect Ratio]: [4:3]
–[Photo Style]: [Standard]
[P] / [A] / [S] / [M] mode can be used only during Tether recording.
After finishing Tether recording, select [Creative Video Mode] in [Rec Mode].
For how to operate the software, refer to the operation guide for “LUMIX Tether”.