Switching the audio input
 Using the built-in microphone/external microphone (stereo mini jack)
Using audio equipment/external microphone (XLR, 3-pin) [X2100]/[X1600]
 Audio recording format
The audio recording format such as compression format varies depending on the [FILE FORMAT].
 [SYSTEM] menu
 ![]() [FILE FORMAT]
[FILE FORMAT]
|
[FILE FORMAT] |
Recording format |
Sampling rate/bit |
|
[MOV] |
Linear PCM (LPCM) |
48 kHz/24 bit |
|
[MP4] |
AAC |
48 kHz/16 bit |
|
[AVCHD] |
Dolby Audio™ |
48 kHz/16 bit |

-
Available for setting when using
 /
/ .
.
Selecting audio input signals (When the handle unit is attached to the unit) ![]() /
/![]()
Selects the audio signal to record in the audio channel 1/audio channel 2.
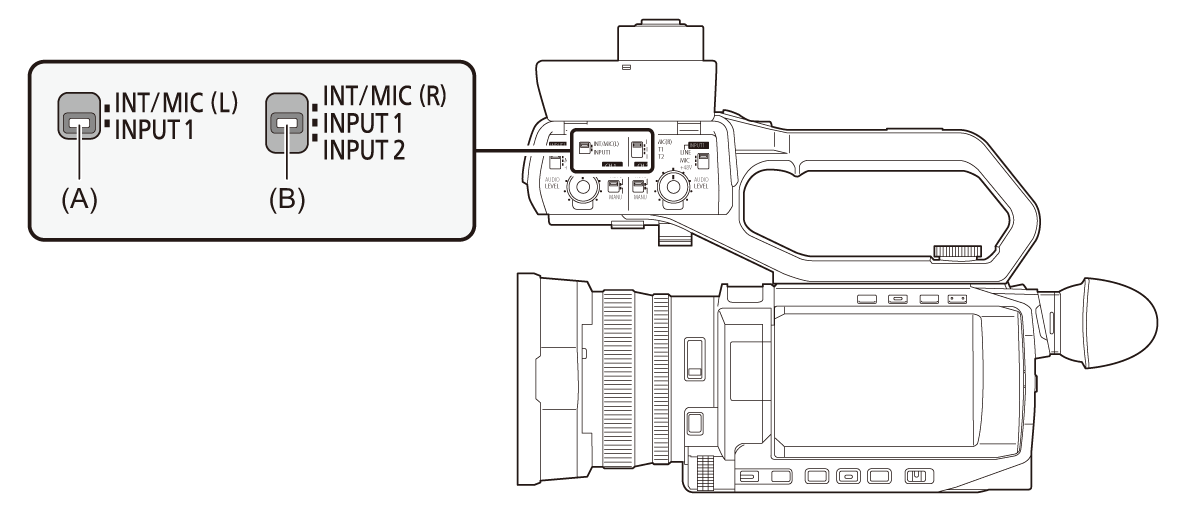
(A) CH1 SELECT switch
(B) CH2 SELECT switch
Confirming audio input setting
The setting for the audio input can be confirmed in the AUDIO screen of the mode check.
For details about AUDIO screen of the mode check ( AUDIO screen).
Using the built-in microphone/external microphone (stereo mini jack)
When an external microphone (stereo mini jack) is connected to the <MIC> terminal, audio switches from the built-in microphone to the audio input of the external microphone connected to the <MIC> terminal.
When the handle unit is attached to the unit ![]() /
/![]()
Make the following settings to switch to audio input from the built-in microphone or external microphone (stereo mini jack).
-
Set the CH1 SELECT switch to the <INT/MIC (L)> position.
The audio signals from <L> of the built-in microphone or the Lch of the external microphone connected to the <MIC> terminal are recorded to audio channel 1.
-
Set the CH2 SELECT switch to the <INT/MIC (R)> position.
The audio signals from <R> of the built-in microphone or the Rch of the external microphone connected to the <MIC> terminal are recorded to audio channel 2.
|
|
Using audio equipment/external microphone (XLR, 3-pin) [X2100]/[X1600]
-
Attach the handle unit to the unit.
-
Connect an audio device or an external microphone to the <INPUT 1>/<INPUT 2> terminal.
-
Switch the connected audio input with the <INPUT1>/<INPUT2> switch.
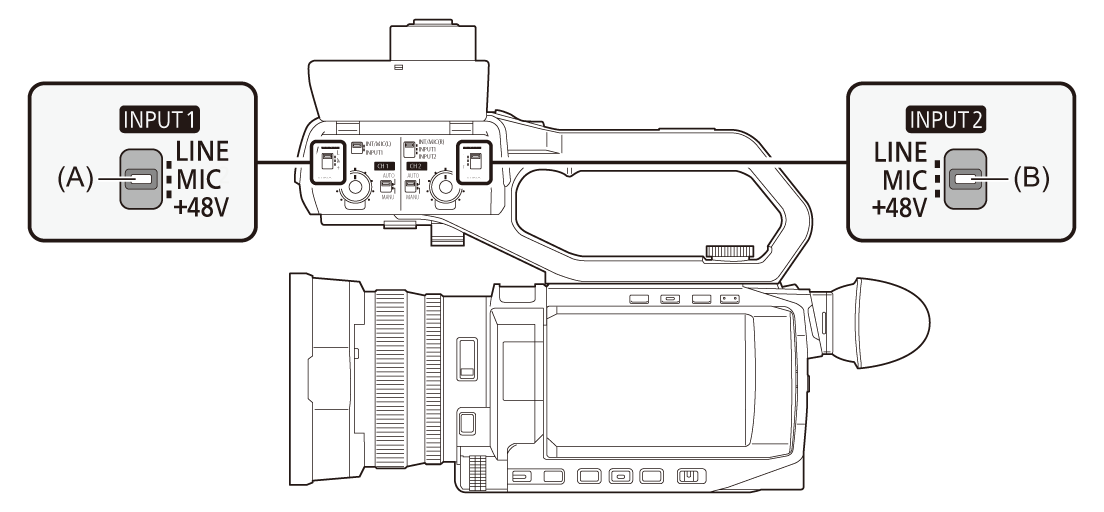
(A) <INPUT1> switch
(B) <INPUT2> switch
|
Connected device |
<INPUT1>/<INPUT2> switch setting |
Menu settings (you can set each channel individually) [AUDIO] menu |
|
|
[INPUT1 MIC LEVEL]/ |
[INPUT1 LINE LEVEL]/ |
||
|
Audio device |
<LINE> |
Disabled |
[4dB], [0dB] |
|
External microphone |
<MIC> |
[−40dB], [−50dB], [−60dB] |
Disabled |
|
External microphone (with power supply) |
<+48V> |
[−40dB], [−50dB], [−60dB] |
Disabled |
-
Factory setting: [−50dB]
-
Factory setting: [0dB]
|
|