Shooting
For shooting, use the following steps.

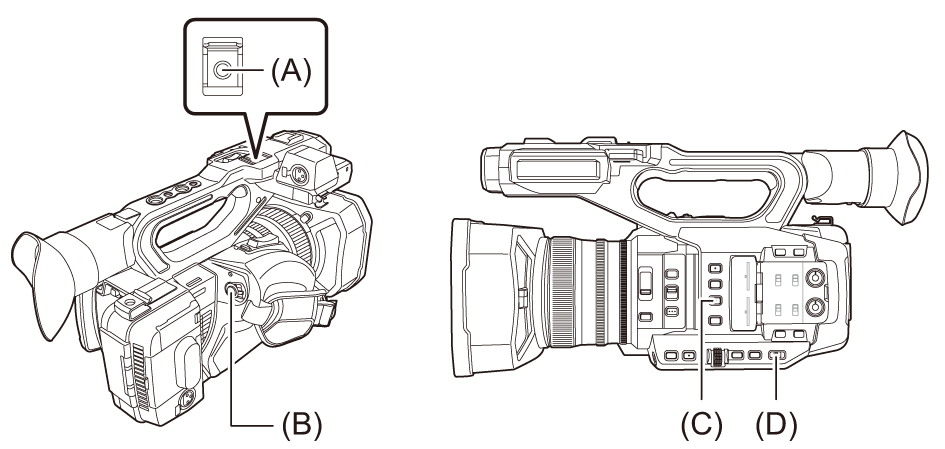
(A) REC button (on the handle)
(B) REC button (on the grip)
(C) <USER3> button ([SLOT SEL] is allocated at the time of purchase.)
(D) <AUTO/MANU> switch
-
Make settings before recording.
 Before shooting, the followings must be set or adjusted.
– Image settings for the brightness function (iris, gain, shutter) and the white balance adjustment function, etc.
– Audio input settings for audio recording.
– Adjusting audio recording level
 Press the <USER3> button to select the memory card to record to.
If the USER button settings have been changed for the <USER3> button, set [SLOT SEL] in one of the USER buttons. ( Assigning functions to the USER buttons)
-
Select shooting mode with the <AUTO/MANU> switch.
-
Start the recording by pressing the REC button.
 One REC button is located on both the handle and the grip.
 The tally lamps are illuminated in red while recording. (
 Tally lamps)
-
Press the REC button again to stop.
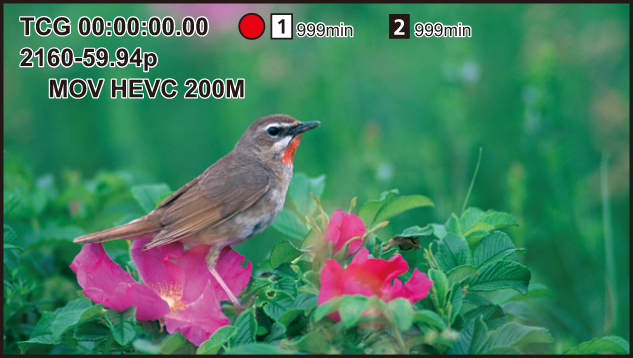
 About the screen displays during recording

[TCG 00:00:00.00]:
Time data ( Setting of time data)
[![]() ]/[
]/[![]() ]:
]:
Card slot number (recording target)

![]() is displayed on the left during recording.
is displayed on the left during recording.
[![]() ]/[
]/[![]() ]:
]:
Card slot number
[999min]:
Remaining recording capacity in the memory card
 The display flashes when the remaining recording capacity falls below 2 minutes.
[2160-59.94p]:
Resolution, frame rate ( Selecting the resolution, codec, and frame rate for recording video)
[MOV HEVC 200M]:
File format, recording format ( Selecting the resolution, codec, and frame rate for recording video)
