Shooting
For shooting, use the following steps.
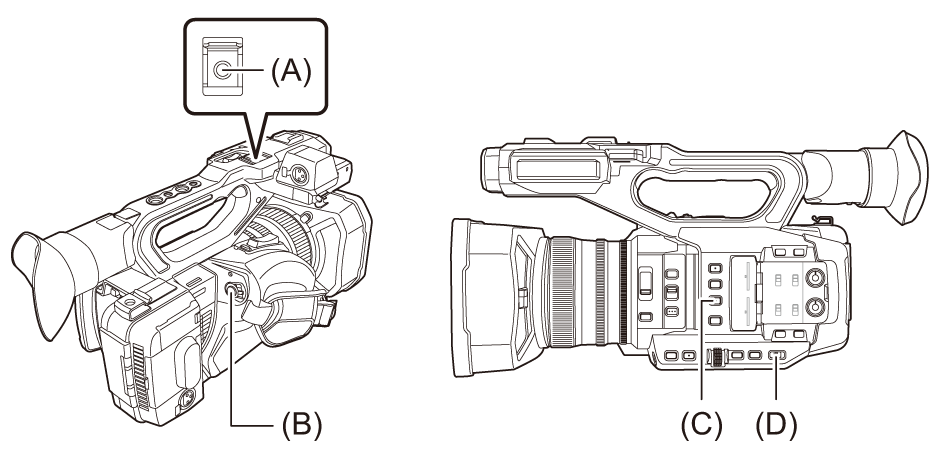
(A) REC button (on the handle)
(B) REC button (on the grip)
(C) <USER3> button ([SLOT SEL] is allocated at the time of purchase.)
(D) <AUTO/MANU> switch
-
Make settings before recording.
 Before shooting, the followings must be set or adjusted.
– Image settings for the brightness function (iris, gain, shutter) and the white balance adjustment function, etc.
– Audio input settings for audio recording.
– Adjusting audio recording level
Press the <USER3> button to select the memory card to record to.
If the USER button settings have been changed for the <USER3> button, set [SLOT SEL] in one of the USER buttons. ( Assigning functions to the USER buttons)
-
Select shooting mode with the <AUTO/MANU> switch.
-
Start the recording by pressing the REC button.
One REC button is located on both the handle and the grip.
The tally lamps are illuminated in red while recording. (Tally lamps)
-
Press the REC button again to stop.
 About the screen displays during recording
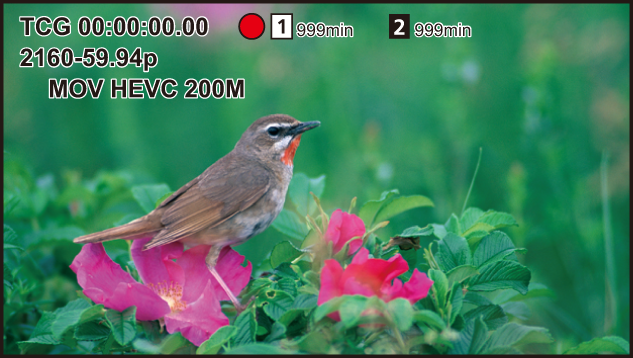
[TCG 00:00:00.00]:
Time data (Setting of time data)
[ ]/[
]/[ ]:
]:
Card slot number (recording target)
 is displayed on the left during recording.
[ ]/[
]/[ ]:
]:
Card slot number
[999min]:
Remaining recording capacity in the memory card
The display flashes when the remaining recording capacity falls below 2 minutes.
[2160-59.94p]:
Resolution, frame rate (Selecting the resolution, codec, and frame rate for recording video)
[MOV HEVC 200M]:
File format, recording format (Selecting the resolution, codec, and frame rate for recording video)