- 5. Recording settings
- Main Assist Functions
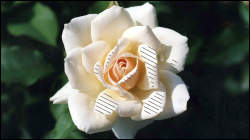
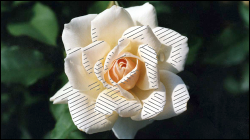
- [Zebra Pattern]
Parts that are brighter than the benchmark value are displayed with stripes.
You can also set the benchmark value and the breadth of the range so that the stripes are displayed on parts that are within the range of brightness you specify.
|
|
|
|
|
[ZEBRA1] |
[ZEBRA2] |
[ZEBRA1+2] |

[MENU/SET] ![]() [
[ ]
] ![]() [
[ ]
] ![]() Select [Zebra Pattern]
Select [Zebra Pattern]
|
[ZEBRA1] |
Parts that are brighter than the benchmark value are displayed with [ZEBRA1] stripes. |
|
[ZEBRA2] |
Parts that are brighter than the benchmark value are displayed with [ZEBRA2] stripes. |
|
[ZEBRA1+2] |
Both [ZEBRA1] and [ZEBRA2] are displayed. |
|
[OFF] |
― |
|
[SET] |
Sets the benchmark brightness. [Zebra 1] / [Zebra 2] 50% to 105% / [BASE/RANGE] |
When [BASE/RANGE] Was Selected with [SET]
Centered on the brightness set with [Base Level], parts with the brightness in the range set in [Range] are displayed with the stripes.
[Base Level] can be set in the range between 0% and 109% (IRE).
[Range] can be set in the range between ±1% and ±10% (IRE).
When [Photo Style] is set to [V-Log L], these are set at Stop units. (Calculated as 0 Stop=42% (IRE))